Electroforming: The Ultimate Guide
I wrote “Electroforming: The Ultimate Guide” for the beginner electro-former to introduce you to the art of electroforming and provide you with the knowledge and tools to get started with this exciting process.
The book covers all aspects of electroforming, including materials, equipment, techniques, and applications, and provides step-by-step instructions, tips, and examples to inspire creativity and encourage exploration.
The book aims to serve as a comprehensive guide for both the technical and creative aspects of electroforming and to be an essential resource for anyone interested in this cutting-edge technique.
Electroforming: The Ultimate Guide… will grow more comprehensive I will be continually adding important electroforming information as I gather it.
Introduction To Electroforming
Electroforming is a process of depositing a thin layer of metal onto a form you want to electroform, such as a ring or pendant, through the process of electrodeposition.
It’s a popular hobby among artists and jewelry makers who are interested in creating unique pieces of art. To get started with electroforming, one needs basic knowledge of electroforming, electrical safety, and proper handling of chemicals.
The necessary equipment for electroforming includes a power supply, a container for the electroforming solution, the form to be electroformed, and the chemicals needed for the solution.
Different metals such as copper, nickel, silver, and gold can be used for electroforming, each with its properties and suitability for specific applications.
Copper is a popular (Copper will be the metal I will be referencing in this article) and relatively inexpensive choice, while gold, silver, and nickel are more expensive but have different properties that may be more suitable for specific projects.
With electroforming, artists and hobbyists can create a variety of items such as jewelry, sculptures, and other decorative items.
Is Electroforming for beginners?
Electroforming can be a challenging process for beginners, as it requires a certain level of knowledge and experience to achieve good results.
However, with dedication and the right resources, anyone can learn the basics of electroforming.
As a beginner, it’s important to start with thorough research and understanding of the process, the equipment, and the required materials and chemicals, as well as the safety measures that need to be taken.
Familiarizing yourself with local regulations and requirements for electroforming is also crucial, as it may be heavily regulated in some areas.
It’s recommended to start with small projects and gradually increase the complexity and size of your projects as you gain experience.
Keeping detailed records of your processes, practicing with scrap materials, and experimenting with different techniques can also help you gain hands-on experience.
Online courses and resources, as well as finding a mentor or joining a community of electroforming enthusiasts, can provide you with the knowledge and skills needed to start experimenting with the exciting process of electroforming.
Remember to always prioritize safety and follow proper disposal methods for chemicals. With patience and persistence, anyone can learn electroforming.
I am also including a few online courses I used to start my electroforming journey. I highly recommend them:
Online Electroforming Courses:
The Ultimate Guide to Copper Electroforming
The Ultimate Guide to Copper Electroforming is an online video course that teaches you how to create your own unique art pieces and jewelry using the electroforming technique. Whether you’re a complete beginner or already have some experience with electroforming, this course is designed to provide you with all the basic concepts, safety tips, troubleshooting advice, and advanced techniques needed to succeed.
The lessons in this course are presented in a clear and easy-to-understand format, allowing you to learn at your own pace and review each module as needed. You’ll start by learning about the basic electroforming system and the essential items required for the process. The course will then guide you through creating your own electroforming system, sealing objects before painting, and the different types of conductive paint and when to use them.
As you progress through the course, you’ll learn about current density, its effects on your items, and how to properly orient them in the tank. You’ll also learn about the important operating conditions of copper electrolytes and how to check your items during the electroforming process. The course concludes with advanced techniques and further processes that can be applied to electroformed items.
Overall, the Ultimate Guide to Copper Electroforming is a comprehensive course that provides you with all the necessary skills and knowledge to create stunning, one-of-a-kind art pieces and jewelry using electroforming.
Don’t wait to start creating your own unique electroformed art pieces and jewelry! Click the link now to enroll in the Ultimate Guide to Copper Electroforming course and begin learning at your own pace. With clear, easy-to-understand lessons and advanced techniques, this course is perfect for both beginners and those with some experience in electroforming. Enroll now and take advantage of a limited-time offer to access this comprehensive course. Don’t miss out on the opportunity to unlock your creativity and learn a new skill – Click the link and enroll today!
Glass Beads 107.1- Copper Electroforming course
Looking to create beautiful, unique glass beads that will stand out from the rest? Look no further than our Glass Beads 107.1- Copper Electroforming course!
Designed for beginners, this class will guide you through the electroforming process, teaching you how to transform plain glass beads into works of art using copper electroplating techniques.
Our experienced instructor will begin by introducing the science behind electroforming in a way that’s easy to understand. From there, you’ll learn all about the equipment and materials required for the process, including safety equipment, containers, copper sulfate solution, conductive paint, and more.
In Section 2 of the class, you’ll get an in-depth review of all the tools and supplies required for copper electroforming. Our instructor will demonstrate how to set up a small and large electroforming cell with the right anodes and will help you learn how to connect your cables properly.
Section 3 focuses on bead preparation, where you’ll learn how to shape and configure your beads for optimal copper adhesion. Our instructor will also show you some painting techniques to create unique designs, including encapsulating your bead in a “copper cage” and using the “belting” technique.
Section 4 is where the real magic happens! You’ll learn how to place your beads into the copper sulfate bath, connect your cables to the DC rectifier, and establish the correct amperage and voltage settings for the electroforming process.
Once the electroforming process is complete, Section 5 will teach you how to finish your beads, including cleaning, deburring, grinding, polishing, and buffing. You’ll also get to experiment with different patinas and coatings to add that extra flair to your designs.
And don’t forget about Section 6! Here, you’ll learn how to filter the used solution so you can reuse it again and again.
This limited-time course is perfect for anyone looking to add a unique twist to their glass bead designs. Click the link now to enroll and get started on your electroforming journey!
Mad Science – Electroforming Tutorial Instant Download version 3, electroforming ebook, digital workshop, free anode bags
Are you interested in creating your own beautiful copper electroformed jewelry? Look no further than this comprehensive and easy-to-follow PDF tutorial! Whether you’re a seasoned jewelry maker or a beginner, this tutorial has everything you need to know to get started with electroforming both organic and inorganic items in copper.
This is the brand new updated Version 3 of the tutorial, and with each purchase, you’ll also receive 2 4″ anode bags by postal mail, completely free of charge! You don’t need any specialized scientific knowledge to learn how to electroform, and you certainly don’t need to be a framework to use this technique. In fact, this 27-page tutorial is so easy to follow that it’s what the seller uses in her electroforming classes.
You’ll learn all the essential information you need to start electroforming, including how to choose a design that will succeed, two different ways to set up your electroforming equipment, what supplies you’ll need, and why each one is important. You’ll also learn how to properly seal organic material, and how to troubleshoot your setup if it doesn’t work.
This tutorial is packed with helpful tips and tricks, including how to make beautiful copper acorn pendants using real acorn caps, how to tell if there’s enough copper built up on your electroformed piece, and how to use electroforming as a prototyping tool to create unique new designs. You’ll even learn how to use everyday materials to create a unique sculptural object using electroforming, and how to turn a copper-electroformed item into a silver-plated item.
With 19 color photographs and 5 drawings, this tutorial is easy to follow and visually engaging. You’ll need a DC power supply (rectifier), conductive paint, and copper conductive solution at a minimum to begin using this technique. And once payment is confirmed, the tutorial will be available for immediate download through Etsy, with no shipping fees!
So why wait? Start creating your own stunning copper electroformed jewelry today with this fantastic tutorial! Click Here
Basic Concept of Electroplating and Redox Reaction
The reason we’re offering this course on electroplating is simple: once you’ve electroformed your copper piece, you can take it to the next level by electroplating it in another metal, like silver or nickel.
Electroplating is a process that allows you to coat one metal with another metal. By learning the basics of electroplating and redox reactions, you’ll be able to take your electroformed copper pieces to new heights.
Imagine being able to create stunning jewelry pieces with a silver or nickel finish, all from the comfort of your own home. With our course, you’ll have the knowledge and skills to make it happen.
Not only is electroplating a fun and rewarding hobby, but it’s also a useful technique for professionals in a range of industries. From jewelry making to manufacturing, electroplating is a versatile skill that can take your projects to the next level.
So, whether you’re a hobbyist or a professional, our “Basic Concept of Electroplating and Redox Reaction” course is the perfect way to learn the fundamentals of electroplating and take your skills to new heights. Enroll today and start your journey toward a more fulfilling and rewarding hobby or career!
Electroforming Resources Check Them Out!
Our electroforming resources page is full of helpful products that will save you time, money, and frustration. Click on the link and explore!
Is Electroforming Expensive?
Is electroforming an expensive process?
It depends on a variety of factors, such as the type of equipment and materials used, the size of the project, and the cost of chemicals and supplies.
Some of the equipment and supplies needed for electroforming can be expensive, such as a power supply, tank, electrodes, and electroforming solution.
However, it’s possible to find more affordable options for equipment and supplies, especially if you’re just starting out.
It’s also important to consider the cost of chemicals and supplies, which can vary depending on the type of project and the materials used.
For example, some electroforming solutions can be expensive, while others may be more affordable. I am going to show you how to save money by making your own electroforming solution.
Additionally, the cost of setup and maintenance of the equipment, as well as labor and time required, should also be considered.
Electroforming can be time-consuming, and you may need to invest time and money into learning the process and developing your skills.
As I delved deeper into the world of electroforming, I found myself dedicating an increasingly larger portion of my time to it. The more I was doing electroforming, the more I came to love it and appreciate its creative outlet.
Overall, the cost of electroforming can vary greatly, and it’s important to do your research and consider all the factors involved before making a decision. How much does electroforming cost for you specifically, would depend on your unique needs and resources.
How Long Does Electroforming Take?
Electroforming is a fascinating process in which a thin layer of metal is deposited onto the art piece you want to coat with copper through an electroforming process.
It’s like a magical transformation, where a simple object is transformed into a metal masterpiece.
Imagine you’re the artist and you want to create a metal sculpture. The first thing you need to consider is the thickness of the metal deposit.
The thicker the deposit, the longer the process will take, just like adding layers to a painting.
If you want a smooth and flawless finish, you need to be patient and let the metal deposit slowly and build up over time.
Next, the size and shape of the object also play a role in determining the duration of the process. If you’re making a large and intricate sculpture, it will take longer for the metal to deposit than if you were making a small and simple one.
Finally, the composition of the electroforming solution is another critical factor to consider. Different solutions have different electroplating rates, and some solutions may be more efficient at depositing metal than others.
Think of it like baking a cake, some recipes are quicker and easier to make than others.
In conclusion, the length of time it takes for the electroforming process to be completed can range from several hours to several days, depending on the desired thickness of the metal deposit, the size and shape of the object, and the composition of the electroforming solution. If you want to find out more about. …
With the right equipment, knowledge, and patience, you can turn your imagination into a stunning metal masterpiece.
What Are The Advantages Of Electroforming?
- Precision: Electroforming allows for the creation of highly precise and intricate shapes, making it ideal for use in the production of beautiful jewelry.
- Replicability: The electroforming process creates exact replicas of a master, making it ideal for mass production.
- Thickness control: Electroforming allows for precise control over the thickness of the deposited metal layer, making it ideal for applications where precise dimensional control is required.
- Consistent quality: The electroforming process is highly repeatable, ensuring consistent quality in the finished product.
- Durability: The metal deposited through electroforming is strong and durable, making it ideal for use in products that need to withstand wear and tear.
- Material versatility: Electroforming can be performed with a wide range of metal materials, including precious metals like gold and silver, as well as base metals like copper and nickel.
- Cost-effectiveness: The ability to produce consistent, high-quality products in large quantities makes electroforming a cost-effective manufacturing process.
- Surface finish: Electroforming can produce high-quality surface finishes.
- Surface modification: The surface of electroformed parts can be easily modified with plating or other surface treatments, enabling the creation of multi-layer structures with different properties.
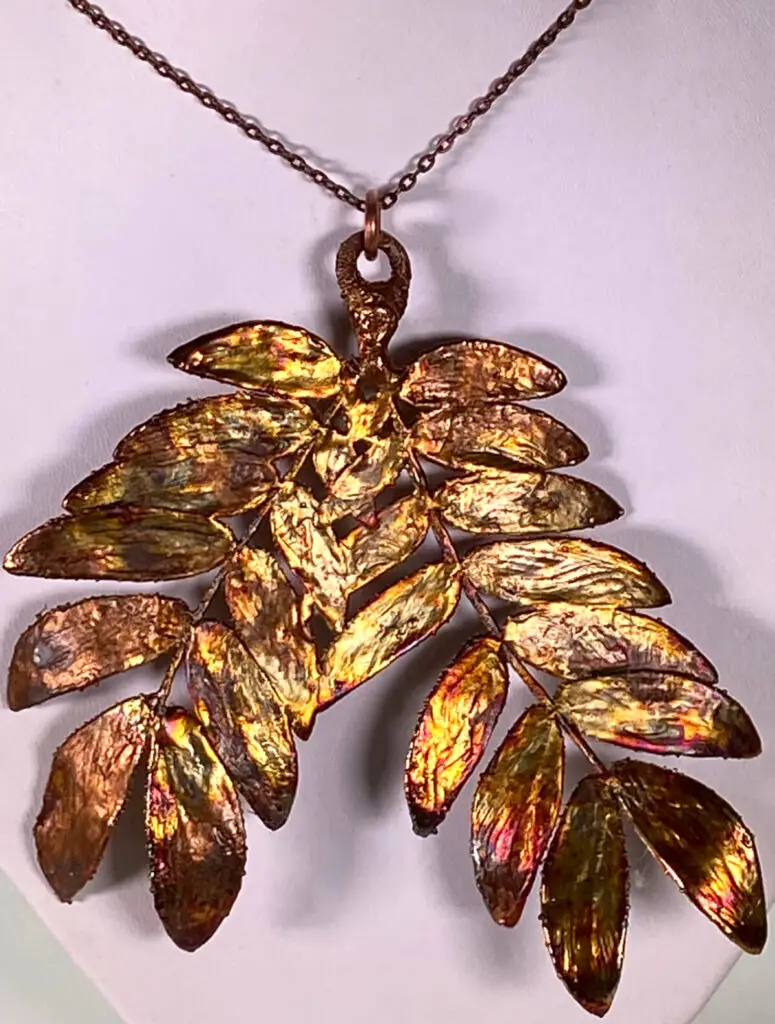
A Look into Jewelry Design
Electroforming can be inspired by different jewelry design styles.
Here are some popular styles and how they can inspire you when you get into the discovery of electroforming:
- Classic – the timeless beauty of classic jewelry design can be achieved through electroforming by creating sleek and simple pieces in precious metals, such as gold and platinum.
- Art Deco – the bold and elegant geometric shapes in Art Deco design can be recreated in electroforming through the use of bright colors and intricate patterns.
- Art Nouveau – the organic forms, fluid lines, and nature-inspired motifs of Art Nouveau can be translated into electroformed jewelry with intricate details and the use of natural materials such as diamonds and gemstones.
- Bohemian – free-spirited jewelry designs can be created with electroforming by incorporating natural materials, earthy colors, and eclectic details.
- Gothic – bold and dramatic Gothic jewelry designs can be created with electroforming through the use of dark, intricate designs incorporating elements such as crosses, skulls, and ravens.
- Retro – the bold and colorful designs of retro jewelry can be achieved with electroforming by incorporating large stones, chunky chains, and oversized hoops.
- Ethnic – the intricately handcrafted elements and cultural symbols of ethnic jewelry can be recreated in electroforming by incorporating techniques such as beading, weaving, and filigree.
- These styles can serve as inspiration for creating unique and creative jewelry designs using the electroforming process.
My Pick for Most Popular Designer
| Jewelry Design Style | Brief Description | My Pick for Popular Designer |
| Classic | Timeless and simple designs in precious metals such as gold and platinum | Angie Marei |
| Art Deco | Bold and elegant geometric shapes with bright colors and intricate patterns | Suzanne Belperron |
| Art Nouveau | Organic forms, fluid lines, and nature-inspired motifs with intricate details and natural materials such as diamonds and gemstones | René Lalique |
| Bohemian | Free-spirited designs with natural materials, earthy colors, and eclectic details | Marla Trudine |
| Gothic | Bold and dramatic designs with dark and intricate elements such as crosses, skulls, and ravens | Michelle Valadon’s |
| Retro | Bold and colorful designs with large stones, chunky chains, and oversized hoops | Charles Krypell |
| Ethnic | Intricately handcrafted designs with cultural symbols using techniques such as beading, weaving, and filigree | Kalki Fashion |
What Is Copper Electroforming Solution?
Copper Electroforming Solution, which I call “Blue Juice,” is a chemical solution used for the process of electroforming.
The Copper Electroforming Solution contains a mixture of chemicals including copper sulfate, sulfuric acid, and other proprietary ingredients.
The exact composition of the solution may vary depending on the manufacturer, but its primary function is to provide a source of copper ions for the electrodeposition process.
The solution is electrically conductive and acts as an electrolyte, allowing the transfer of electrical current between the piece to be electroformed and the metal being deposited (Copper Metal).
The electric current causes the copper ions in the solution to reduce and deposit onto the piece, forming a layer of metal. This process can be repeated to build up thickness and create three-dimensional structures.
The “Blue Juice” comes from the beautiful blue color of the solution, which is a result of the presence of copper ions. The solution is typically stored in containers with proper labeling and handling instructions and must be handled with caution due to its corrosive nature. If you want to find out more about. …
In conclusion, Copper Electroforming Solution is an essential component in the electroforming process and plays a crucial role in the creation of a lot of my art projects.
Your shopping list for Copper Electroforming Solution
- Zep Root Kill (for Copper Sulphate Pentahydrate, available in the USA only)
- Battery acid (98% Sulphuric Acid, contains 37% Sulphuric Acid)
- Sodium Chloride or Hydrochloric Acid
- Midas Replenishing Brightener for Electroforming Copper (Add 5 drops per 1000 mL for your desired amount required).
- Distilled water (only distilled water, not tap or bottled water!)
- Scale (preferably a precise one for measuring in milligrams)
- Measuring cups (one in ounces and one in milliliters)
- Sterile syringes
- Glass stirring rod or magnetic stirrer
- 1L HDPE bottles (with safety caps)
- Funnel
- 1000ml/1 liter glass beaker
- Safety goggles
- Mask
- Gloves
It is important to note that concentrated sulfuric acid Copper Sulphate and Hydrochloric Acid acid are dangerous chemicals and should be handled with care.
Gloves, eye protection, and proper ventilation should be used when handling these chemicals.
Additionally, the solution should not be ingested or come into contact with skin or eyes, as it can cause severe burns or chemical reactions.
This recipe is a starting point and may require adjustments depending on the desired outcome and materials being used in the electroforming process.
How To Make Your Own Copper Electroforming Solution?
Ingredients For Electroforming Solution:
- 1 liter distilled water
- 200g / 7.05 ounces Copper Sulphate or Zep Root Kill
- 0.05ml Hydrochloric Acid
- 40ml / 1.352 US fluid oz of 98% Sulphuric Acid OR 135 mL/ 4.395 US Fluid oz of Battery Acid
- Rio Grande Midas or Caswell part B brightener (optional)
Equipment For Electroforming Solution:
- Beaker/Plastic HDPE bottle, jar, or acid-proof container that can hold an acid solution:
- [When working with (electroforming) acidic solutions, ensure that you only use Type 2 (High-Density Polyethylene) or Type 5 (Polypropylene) plastic, as they are known to be safe for handling acidic materials. To distinguish between the different types of plastic, look for the triangular symbol with a number inside, which indicates the specific type of plastic material.]
- Glass stirring rod
- Sterile syringe
- Safety equipment (gloves, goggles, Mask etc.)
Instructions For Electroforming Solution:
- Start by adding 1 liter of distilled water to your beaker.
- Add 200g / 7.05 ounces of Copper Sulphate or Zep Root Kill to the water.
- Use a glass stirring rod to stir the solution until fully dissolved and mixed.
- Using a sterile syringe, add 0.05ml of Hydrochloric Acid to the solution.
- Using a fresh sterile syringe, add 40ml / 1.352 US fluid oz of 98% Sulphuric Acid OR 135 mL/ 4.395 US Fluid oz of Battery Acid.
- Be sure to add acid to water and NEVER the other way around.
- Stir the solution until everything is fully dissolved and the chemicals have properly mixed.
- Pour the solution into an HDPE bottle or other acid-proof container using a funnel.
- Secure the container with a safety cap.
- 10.(Optional) add a few drops of Rio Grande Midas or Caswell part B brightener to the solution.
- 11. When you are finished marking your container where the liquid line is so you can add distilled water when the solution evaporates.
Important Information Copper Electroforming Solution:
- Be careful when working with acid and always wear safety equipment.
- Use distilled water when topping up your electroforming solution to the fill line you marked when you first made the solution, to achieve the proper potency of the solution.
- The recipe above is for 1 liter of electroforming solution, but it can be multiplied by a factor for larger amounts.
How To Store Your Copper Electroforming Solution?
- Store the solution in a well-labeled, airtight container.
- Store the container in a cool, dry place away from direct sunlight.
- Store the container away from heat sources, as high temperatures can cause the solution to break down.
- Store the container away from open flames or sparks.
- Store the container out of reach of children and pets.
- Store the container in a secure location, to prevent accidental spillage or contamination.
- Store the container in a location that is easily accessible when you need to use the solution.
- Store the container with care, as it is made of glass and can break if dropped.
- Check the solution regularly for any signs of contamination or breakdown, and dispose of it if necessary.
- Follow the manufacturer’s recommendations for storage, as they may have specific requirements or guidelines that you need to follow.
In conclusion for Copper Electroforming Solution
It is crucial to store your Copper Electroforming Solution properly to ensure its longevity and effectiveness.
Proper storage also helps to prevent accidental exposure to hazardous chemicals, which can be dangerous to human health and the environment.
When handling and storing Copper Electroforming Solution, it’s important to always follow safety guidelines and use protective gear, such as gloves and eye protection, to prevent injury.
Additionally, it’s crucial to store the solution in a well-ventilated area, away from heat sources, sparks, and flames. Taking these precautions will help ensure that you can use your Copper Electroforming Solution safely and effectively for many projects to come.
Can You Reuse the Electroforming Solution?
Yes, it is possible to reuse electroforming solutions, but it is important to be cautious and follow safety precautions as they can contain hazardous materials.
Over time, the solution may lose its effectiveness due to evaporation and the accumulation of impurities, so it is recommended to filter ( I will cover electroforming filtration later on in the article) the solution after a few uses and to test its pH level and conductivity.
Adding distilled water can help maintain the desired concentration, but in some cases, it may be more cost-effective or safer to make a new batch.
It’s always important to use caution and follow good safety practices when working with electroforming solutions, whether new or reused.
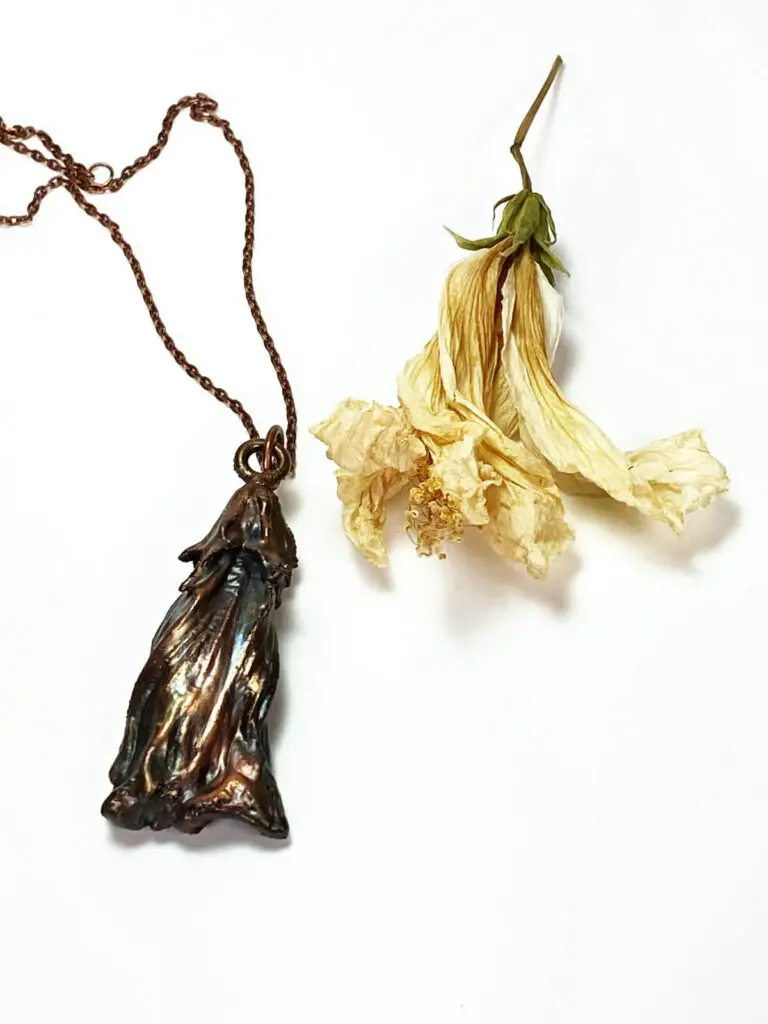
How do you neutralize the electroforming solution?
- Steps to Neutralize Electroforming Solution:
- Add acid or base to the solution until the pH reaches 7.
- Consult the manufacturer’s instructions for the specific solution being used to ensure the proper neutralization method is used.
- Use baking soda (sodium bicarbonate) as an alternative method for neutralizing an acidic solution.
- Use proper safety precautions when working with chemicals.
- Dispose of the neutralized solution in accordance with local regulations.
- Check the pH of the solution using pH paper or a pH meter after adding any neutralizing agents.
- Continue adding the neutralizing agent until the pH reaches a neutral value of 7.
In conclusion, neutralizing electroforming solution
In conclusion, neutralizing an electroforming solution is important to ensure its safe disposal.
This is typically done by adding an acid or base until the pH reaches a neutral value of 7.
Baking soda can be used as an alternative method.
It is important to follow the manufacturer’s instructions, use proper safety precautions, and dispose of the neutralized solution in accordance with local regulations.
Checking the pH with pH paper or a pH meter after adding any neutralizing agents is also recommended to ensure a neutral solution.
To dispose of your copper electroforming solution, you need to follow the following steps:
Neutralize the solution: Neutralizing the solution is important to make it safe for disposal. Add acid or base to the solution until the pH reaches a neutral value of 7.
Consult local regulations: Check the regulations of your local government or environmental agency to determine the proper method of disposal for your specific type of solution.
Proper disposal: Dispose of the solution in a designated hazardous waste facility or through a waste disposal company that specializes in chemical waste.
Labeling and packaging: Label the container with the name of the solution and the date of disposal.
Store it in a secure and upright position in a container that is leak-proof and made of compatible materials.
Personal safety: Always wear protective gloves and eye protection when handling the solution.
It is important to handle the solution carefully to minimize environmental contamination and to protect the health of yourself and others. Proper disposal is also critical to prevent harm to the environment and wildlife.
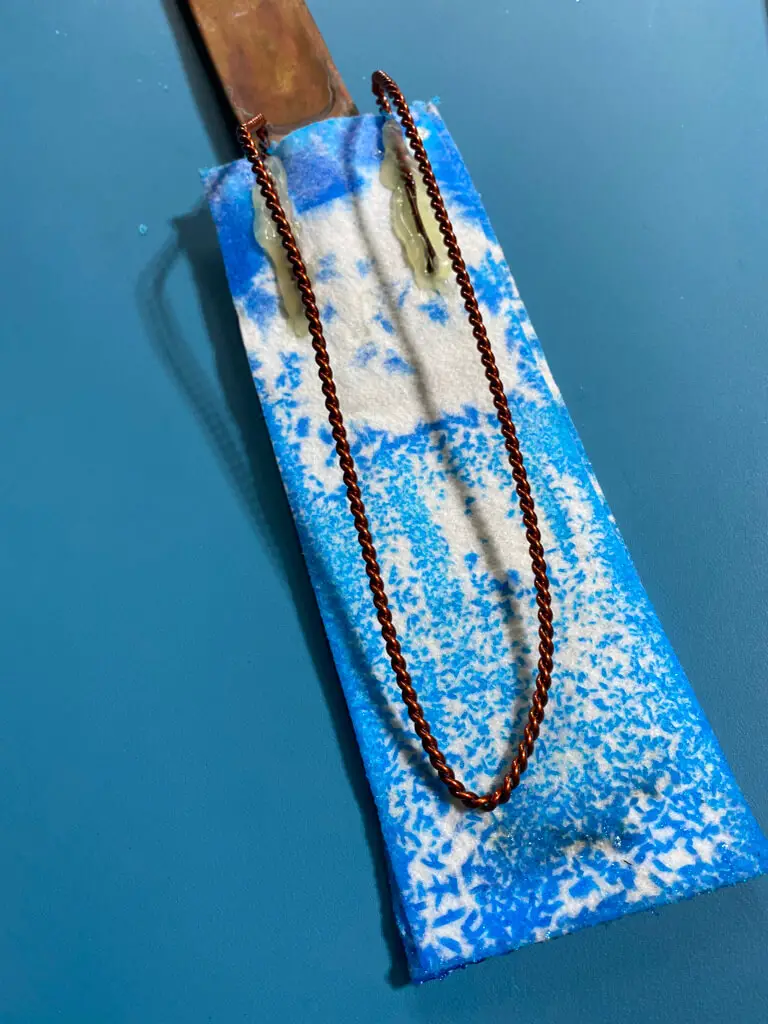
What Are Electroforming Anode Bags Used For?
Electroforming anode bags are used in the electroforming process to contain the anode and prevent small metal particles from entering the electroforming solution.
The bag acts as a filter, ensuring optimal results and preventing bumps and distortions in the final product.
The best material for an electroforming anode bag is Polypropylene for copper your bath.
Despite using an anode bag, it is still necessary to filter the electroforming solution for optimal results.
Electroforming anode bags are crucial for achieving desirable results in the electroforming process.
Click the link for comprehensive in-depth information and take your understanding of What Are Electroforming Anode Bags Used For? “Prevent Problems” to the next level.
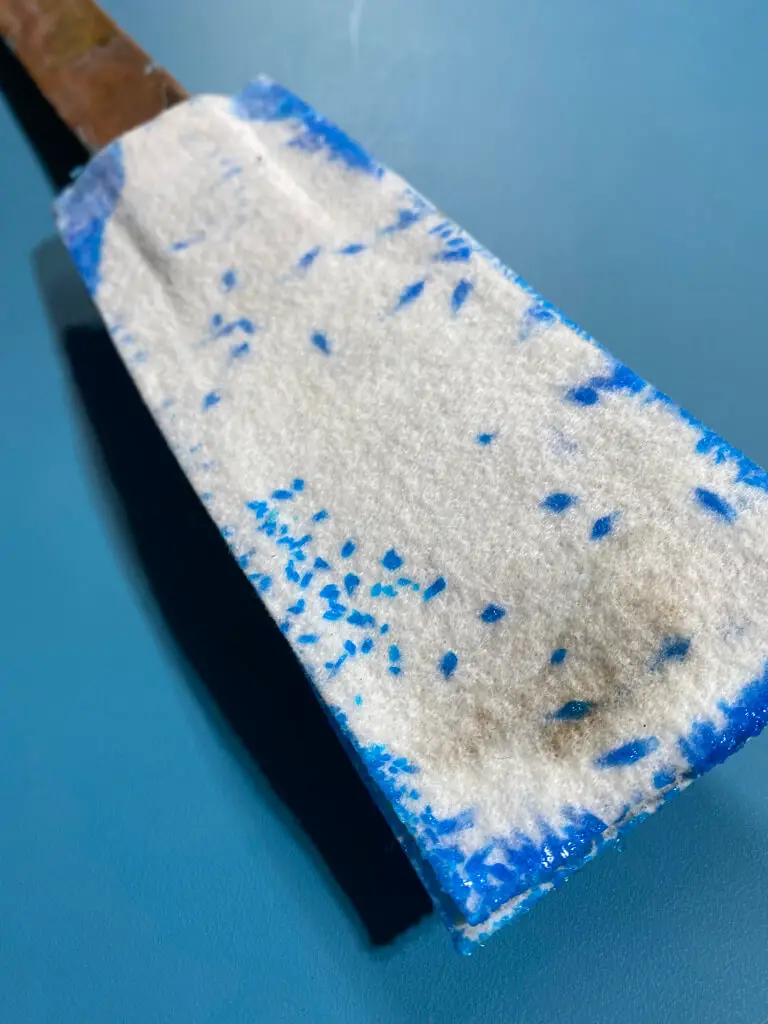
How To Make Your Own Anode Bags | Step By Step for Electroforming
Electroforming is a fascinating process that involves using electrical currents to deposit metal onto a surface.
The result is a uniform, high-quality metal layer that is perfect for a wide range of applications, from jewelry-making to beautiful pieces of art.
One of the most important components of electroforming is the anode bag, which is used to hold the metal (copper pipe) that will be deposited onto the surface of your piece.
Let me walk you through the steps for making your own anode bags for electroforming.
What materials you’ll need to make your anode bags:
Copper pipe (Anode)
Non-woven polypropylene fabric (5-micron Poly Felt)
Hot glue & Hot Glue Gun OR Sewing machine or needle and thread
Scissors
Step 1: Cut the Copper Pipe
The first step in making your anode bags is to cut the copper pipe to the desired size. Depending on the size of your electroforming setup, you may need to cut multiple pieces. If you’re using a large electroforming bath, you may need to cut the pipe into several smaller pieces to make it easier to handle.
Step 2: Cut the Non-Woven Fabric
Once you have the copper pipe cut to size, the next step is to cut the non-woven polypropylene fabric (5-micron Poly Felt) to a bit bigger size. This fabric is used to provide a barrier between the metal (copper) and the surface you’re electroforming.
Step 3: Sew OR Hot Glue the Fabric Together
With the fabric cut to size, the next step is to hot glue or sew them together. Start by placing one piece of fabric on top of another piece of fabric, making sure that the fabric covers the entire copper pipe. Use a sewing machine or needle and thread to sew the two pieces of material together, making sure to leave one end of the fabric open so that you can put the copper pipe into the anode bag.
Step 4: Put the Copper Pipe into the Anode Bag
Once the two pieces of fabric are together, the next step is to place the copper pipe into the anode bag. Simply place the copper pipe into the top gap at one end of the anode bag.
Conclusion: How To Make Your Own Anode Bags
Making your own anode bags for electroforming is a simple and cost-effective way to get started with this fascinating process. With just a few basic materials and a little bit of time, you can create high-quality anode bags that will help you produce uniform, high-quality metal deposits.
Brightener & Conductive Paint | Techniques and Tips
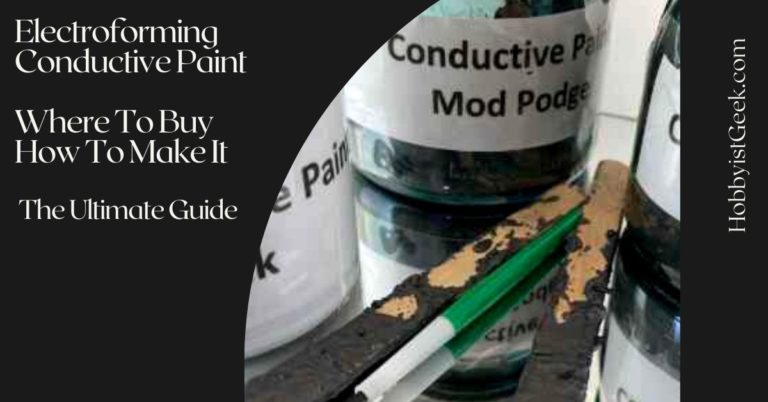
Electroforming Conductive Paint
The use of electroforming conductive paint is one of the most important ingredients used in the electroforming process.
It enables you to use a wider range of materials, including plastic and other non-conductive materials, which would otherwise not be suitable for electroforming.
The conductive paint is applied to the surface of the material to be electroformed, and the metal deposition is then carried out using the electroforming process.
There are different types of conductive paint available, each with its own specific properties and advantages.
When choosing a conductive paint, it is important to consider the specific requirements of your electroforming process, including the type of metal to be deposited and the desired finish of the final product.
In conclusion, electroforming conductive paint plays a crucial role in the electroforming process by providing a conductive surface on non-conductive materials.
The use of conductive paint ensures that metal, such as copper, is evenly deposited on the surface, resulting in a more uniform and consistent final product.
The table of contents is empty because you aren’t using the paragraph styles set to appear in it.
By providing a conductive surface, electroforming conductive paint helps to enhance the quality and accuracy of the electroforming process.
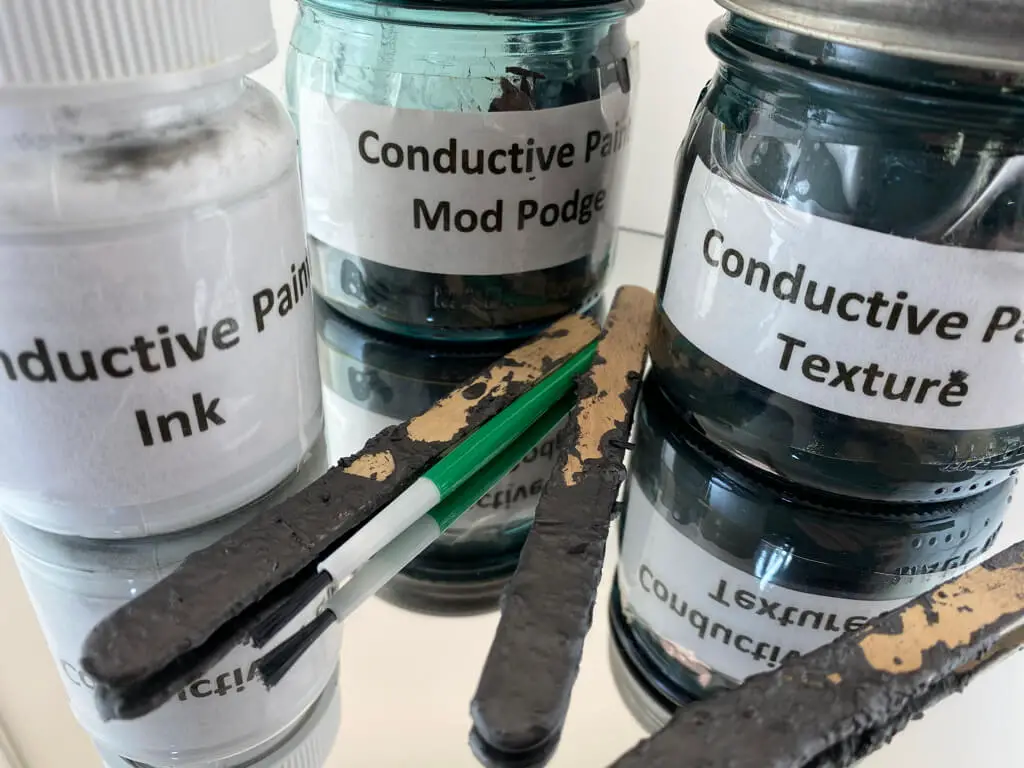
Electroforming Conductive Paint Recipe with Mod Podge:
Shopping List For Electroforming Conductive Paint:
- Airtight Plastic Container
- Marble (for mixing the paint after it’s been sitting for a while)
- Stirrer (bamboo, wooden stick, or electric Dremel)
- Mod Podge (matte finish)
- Graphite Powder
- Distilled Water
Instructions For Electroforming Conductive Paint:
- In your airtight plastic container, mix equal parts Mod Podge (matte finish) and Graphite Powder.
- Slowly add distilled water to the mixture as needed, until you reach the desired consistency.
- Use a stirrer (manual bamboo, wood stick, or electric Dremel) to ensure that the paint is smooth and free of any clumps a consistent paste.
- The paint is now ready to use for electroforming. Apply a thin layer to your conductive surface and begin the electroforming process allow to dry.
- I use a few marbles at the bottom of my container to help with mixing the paint after it’s been sitting for a while.
Electroforming Conductive Paint Recipe with India Ink:
India ink is used in this recipe for electroforming conductive paint because it is much thinner than paint made with Mod Podge.
The ink’s consistency is more fluid than that of paint, this feature allows for a more controlled application, making it easier to apply thin and even layers. The ink can also be thinned out with water if necessary to achieve the desired consistency.
Shopping List For Electroforming Conductive Paint with India Ink:
- Airtight Plastic Container
- Marbles (for mixing the paint after it’s been sitting for a while)
- Stirrer (manual bamboo or electric Dremel)
- Speedball India Ink
- Graphite Powder
Instructions For Electroforming Conductive Paint with India Ink:
- In your airtight plastic container, mix equal parts Speedball India Ink and Graphite Powder.
- Stir the mixture until it becomes a smooth and consistent paste.
- Use the stirrer (manual bamboo, wooden stick, or electric Dremel) to ensure that the paint is smooth and free of any clumps.
- The paint is now ready to use for electroforming. Apply a thin layer to your conductive surface allow it to dry and then begin the electroforming process.
- Use the marbles to help with mixing the paint after it’s been sitting for a while.
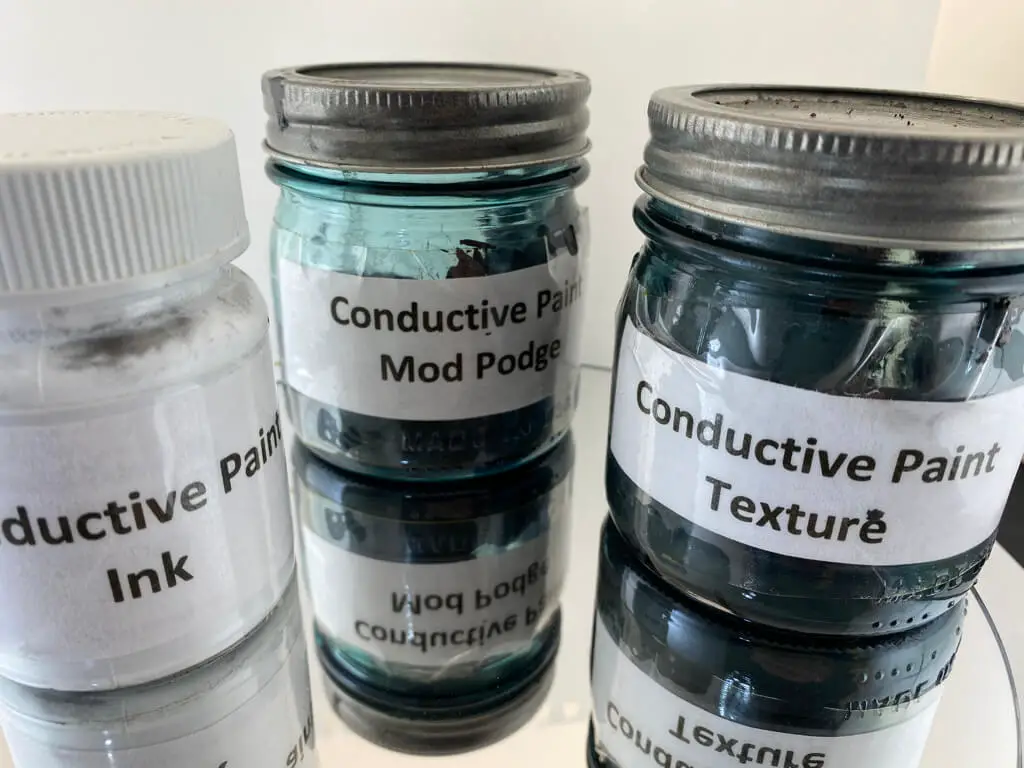
Textured Electroforming Conductive Paint
Textured electroforming conductive paint adds a unique and interesting texture to the final electroformed product.
The small pieces of crushed glass or glass beads, small copper cuttings, or other small particles that are added to the paint mixture become embedded in the paint and subsequently become electroplated with the deposited metal.
This results in a unique textured surface on the final product, adding visual interest and depth.
Additionally, the use of textured conductive paint can also help to hide small imperfections on the surface of the object being electroformed, resulting in a more polished final product.
The textured paint can also be used to create specific patterns or designs on the final product, making it an ideal choice for detailed and decorative work.
Overall, using textured conductive paint in the electroforming process allows for greater creative possibilities and can result in a more unique and interesting final product.

Textured Electroforming Conductive Paint Recipe:
Shopping List:
- Airtight Plastic Container
- Marbles (for mixing the paint after it’s been sitting for a while)
- Stirrer (manual bamboo or electric Dremel)
- Mod Podge (matte finish)
- Graphite Powder
- Distilled Water
- Small pieces of crushed glass or glass beads
- Small copper cuttings
- Sand or other small particles
Instructions:
- In your airtight plastic container, mix equal parts Mod Podge (matte finish) and graphite powder.
- Slowly add distilled water to the mixture as needed, until you reach the desired consistency.
- Add small pieces of crushed glass or glass beads, small copper cuttings, or other small particles to the mixture.
- Use the stirrer (manual bamboo or electric Dremel) to ensure that the paint is smooth and free of any clumps.
- The paint is now ready to use for electroforming. Apply a thin layer to your conductive surface let dry and begin the electroforming process.
- Use the marbles to help with mixing the paint after it’s been sitting for a while.
What Is Electroforming Brightener?
Have you ever seen a shiny, smooth metal piece and wondered how it was made?
One way to make metal pieces like that is by using a process called electroforming.
In electroforming, metal is deposited onto a surface to make your piece.
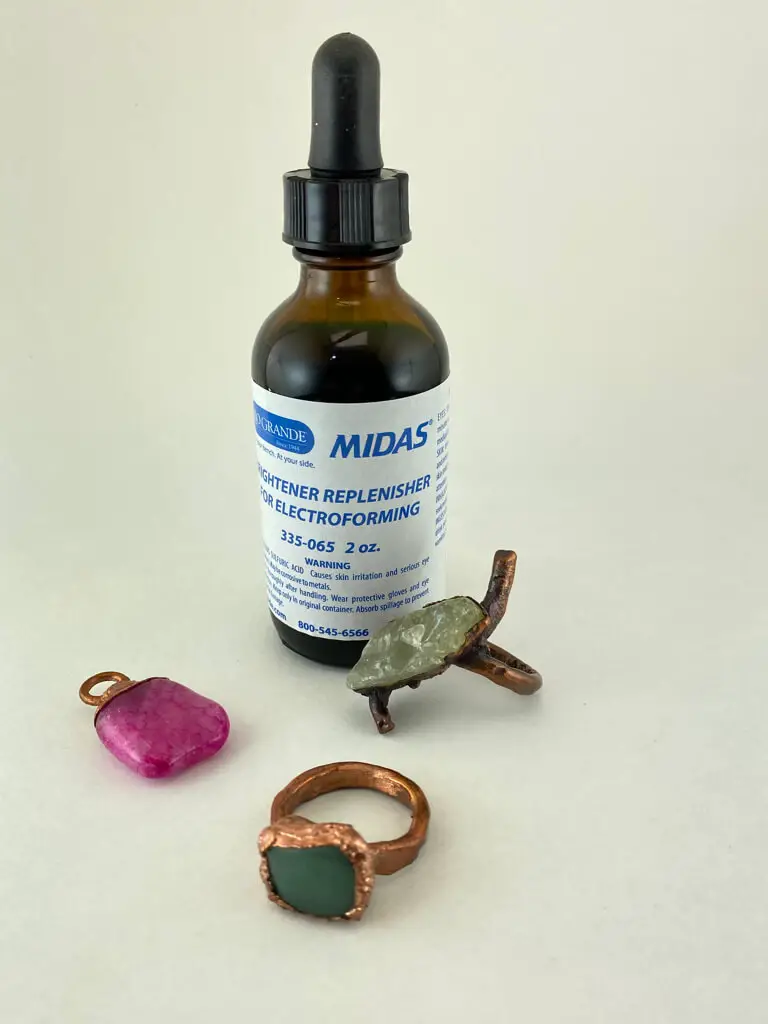
To make the final piece of art even better, a special chemical called Electroforming Brightener is added to the process.
This brightener makes the metal even brighter and smoother.
There are different types of Electroforming Brighteners for different metal pieces and processes, so it’s important to choose the right one.
In conclusion, electroforming Brighteners are an important part of the process of making metal pieces.
By choosing the right brightener, you can make your metal pieces even brighter and smoother.
The right Electroforming Brightener can make a big difference in the final product and help you make a great metal piece!
If you want to find out more about. …
Where to get Electroforming Brightener:
Here are five different places where you can get Electroforming Brightener:
Midas Replenishing Brightener for Electroforming Copper
Website: https://www.riogrande.com/search-page/?q=Brightener&tab=products
COPPER BRIGHTENER PART A – 1.5 OZ
Website: https://caswellplating.com/copper-brightener-part-a-1-5oz.html
COPPER BRIGHTENER PART B
Website: https://caswellplating.com/copper-brightener-part-b-4oz.html
By Electro Jeweler Jordan
Electroform Brightener (Copper) Part A
Website: https://electrojewelerjordan.com/shop/brighteners/copper-brightener/as-seen-on-you-tube-copper-brightener-electroform-brightener-powder-low-shipping-cost-ships-anywhere-easy-to-use-just-add-water-brightener-curious-part-a/
Electroform Brightener (Copper) Part B
Website: https://electrojewelerjordan.com/shop/brighteners/leveling-agent/electroform-smoother-electrosmootho-copper-plating-leveling-agent-low-shipping-cost-ships-anywhere-in-the-world-just-add-water-ez-to-use-2/
These websites sell different types of Electroforming Brightener for copper, which is used to make copper plating look shiny and bright.
The Problem of Having Too High or Too Low Amounts of Electroforming Brightener
High amounts of copper electroforming brightener:
Electroforming brightener plays a crucial role in ensuring the quality of the final product look.
It’s important to maintain the correct amount of brightener in the bath to avoid various problems.
The Problem of Having Too High Amounts of Electroforming Brightener:
Excessive brightener concentration can lead to a range of issues in the electroforming process. Some of the most common problems include:
- Excessive foaming: Overly high brightener levels can cause excessive foaming, making it challenging to control the electroforming process and leading to poor-quality final products.
- Reduced metal deposition: If the brightener concentration is too high, it can interfere with the metal deposition process, resulting in reduced amounts of copper being deposited on the piece, which can make the final product weaker and less durable.
- Surface defects: High brightener concentrations can cause surface defects such as pinholes, nodules, and pits on the final product, which can negatively impact the appearance and functionality of the piece.
- Increased bath maintenance: Excessive brightener levels can result in a build-up of impurities in the electroforming bath, increasing the frequency of bath maintenance, and resulting in additional time and cost for the process.
Low amounts of copper electroforming brightener
Low amounts of electroforming brightener can lead to the following problems during the electroforming process:
- Reduced brightness: If the brightener concentration is too low, the final electroformed product may not have a bright finish as desired. This can negatively impact the appearance of your art because a bright finish enhances the visual appeal of the product.
- Increased surface roughness: The surface roughness of the final product may be higher than desired if the amount of brightener is not enough. A rough surface can result in a less smooth and less reflective surface. This can reduce the quality of the product and make it look less attractive.
- Reduced electroforming efficiency: If the brightener concentration is too low, the electroforming process may take longer to complete or may not be as efficient as desired. This can result in increased time and cost for the process.
- Inadequate deposit: Without enough brightener, the deposit may not be as uniform or consistent. This can negatively impact the final product’s appearance and functionality. A uniform deposit is important because it helps ensure that the product has the desired thickness, strength, and durability.
What is a magnetic stirrer?
A magnetic stirrer is a versatile tool that can be used for a variety of purposes, including the hobby of electroforming.
Electroforming is a process where a metal layer is deposited onto a conductive surface. In this process, it’s important to have a uniform mixture of the electroforming solution, and a magnetic stirrer can help achieve this.
By placing the stirrer in the solution, the magnetic pill rotates and circulates the liquid, ensuring that the solution remains mixed throughout the electroforming process.
Understanding Your Power Supply for Stunning Results
Power Supply Setup:
- Connecting the wires to your power supply and the electroforming tank:
- Turn off the power supply by turning both the amperage and current knob all the way to the left (the off position)
- Connect the positive wire (generally red-colored) to the anode of your copper source.
- Connect the negative wire bus bar (black) to the cathode of the object you want to electroform.
- Attach the copper wire that holds the piece to be electroformed at the bus bar.
- Check all the connections properly and make sure that the wires are securely attached to the anode and cathode before turning on the power supply.
- Attach all the wires above the electroforming solution, to avoid any direct contact between the copper wire and the electroforming solution.
Click the link for comprehensive in-depth information and take your understanding of Best Electroforming Power Supply to the next level.
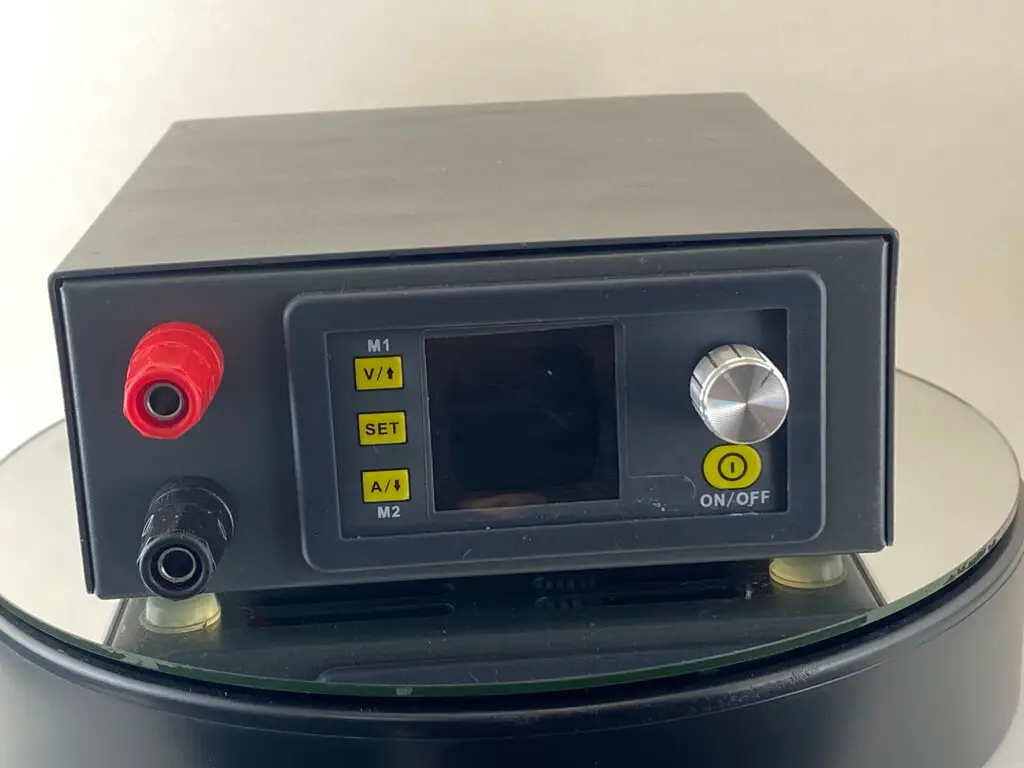
Power Supply
Your success in electroforming depends heavily on the quality of the power supply you use.
Here are some reasons why a good power supply is essential for electroforming:
Consistent current flow: Electroforming requires a constant and controlled current flow to ensure that the metal deposition is even and smooth. A good power supply will provide a stable current that is not affected by fluctuations in voltage or other external factors.
Precise control: A good power supply allows for precise control over the current and voltage used in the electroforming process. This is essential to achieve the desired thickness and quality of the metal coating.
Safety: Electroforming involves working with electricity, which can be dangerous if not handled correctly. A good power supply should have safety features, such as circuit protection and grounding, to prevent accidents and damage to equipment.
Efficiency: Using a good power supply can increase the efficiency of the electroforming process by reducing the amount of time and energy required to deposit the desired amount of metal.
Overall, investing in a high-quality power supply for electroforming can improve the quality, efficiency, and safety of the process, leading to better results and a more productive workflow.
Calculate the surface area and Amps for electroforming
To calculate the amps, you would then multiply the surface area by 0.1. In the case of a 6-inch piece to be electroformed x 0.1 = 0.6 amps.
Then place your piece into the electroforming solution.
I then set my amps to about 0.2 or 0.3 and check the piece often to monitor my desired copper build-up.
Electroforming Safety Precautions
Electroforming is a hobby and art form that involves working with electricity and chemicals, and it is important to take the necessary safety precautions to protect yourself and the environment.
- Wear Protective Equipment: One of the most important safety methods when working with the electroforming process is to always wear appropriate personal protective equipment (PPE). This includes gloves to protect your hands from hazardous chemicals, splash goggles to protect your eyes from splashes and spills, and a respirator or mask to protect your lungs from inhaling fumes.
- Wear Protective Clothing: It’s also important to wear protective clothing such as aprons and long sleeves to protect the skin from splashes.
- Proper Handling and Storage of Chemicals: Proper handling and storage of chemicals is also an important safety measure when working with electroforming. It’s important to always keep chemicals away from children and pets and to properly label and store them in a cool, dry place.
- Disposing of Electroforming Solutions: When disposing of electroforming solutions, it’s important to follow the guidelines and regulations set by your local government. This may include neutralizing the solution with baking soda and disposing of it in a hazardous waste facility.
- Work in a Well-Ventilated Space: Another important safety method is to work in a well-ventilated space. This is especially important when working with electroforming solutions that contain dangerous chemicals such as sulfuric acid and copper sulfate. This can be achieved by having open windows or an extractor fan to remove any fumes.
Troubleshoot Electroforming Problems With Fixes?
Contaminated electroforming solution
- Seal the Piece: To prevent contamination, it is important to properly seal the piece you are electroforming. This can be done by coating the piece in a non-conductive and waterproof layer, such as resin or nail polish.
- Maintain a Clean and Controlled Environment: Keeping the electroforming environment clean and controlled helps prevent contamination from outside sources.
- Filter Contaminated Solution: If the electroforming solution becomes contaminated, it should be filtered out before attempting to electroform again.
- Gain Experience: As you gain more experience with electroforming, you will learn how to prevent contamination through various techniques and methods.
Poor electrical connections
- Check and fix any issues with the electrical circuit
- Rundown of the entire electrical circuit, check anode, cathode, and wires for proper connection and optimal contact
- If the problem persists, order replacement components or replace parts one by one to identify the cause
- Prevent electrical issues by taking care of equipment and replacing components before an issue arises
Conductive Paint For Copper
- Low brightener levels in electroforming solution result in dull, rough, or pink-looking metal parts
- Brightener is an important component in the electroforming process, making the metal surface brighter and shinier
- To resolve low brightener levels, add more brightener to the electroforming setup
- It is important to monitor brightener levels regularly to ensure optimal results in the electroforming process
Low Temperature of Electroforming Bath
- Optimal temperature for electroforming copper: 24℃ to 30℃ or 75℉ to 86℉
- Importance of maintaining bath temperature within this range for best results
- Use of warming devices such as an electric heating pad or approved fish tank heater
- Safety precautions when using electric devices near water.
- Awareness of temperature changes, especially in winter, to maintain optimal bath temperature for the electroforming process.
High Temperature of Electroforming Bath
- High temperature in an electroforming bath can result in a dull, rough, and pink final product.
- The optimal temperature for electroforming is between 24℃ to 30℃ or 75℉ to 86℉.
- Use a thermometer to measure the temperature of the bath and bring it back within the optimal range.
- An Aquarium Chiller, Fish Tank Cooling Fan System can be used to bring the temperature down in the tank.
- Achieving the optimal temperature will result in a better-quality final product.
Electroforming Solution has a High Current / Amperage
- Set the current according to the surface area of the piece being plated.
- Use a general rule of thumb of 0.1 amps per square inch of surface area.
- Use a surface area calculator to calculate the surface area of any shape.
- If the piece is burned, it cannot be salvaged.
How to calculate surface area and Amps for electroforming
- Use the general rule of thumb of 0.1 amps per square inch of surface area.
- Calculate the surface area of the piece being electroformed by using an area calculator or manually measuring the length and width of the piece and multiplying them.
- Example: (length x width BOTH sides) x 0.1 = amps.
- Set the amps to the calculated value to achieve the most detail on the piece.
How To Keep Organics From Floating
Here are a few techniques for preventing organics from floating during electroforming:
- Attach a weight to the bottom of the organic (e.g., a piece of scrap copper or sea glass)
- Use a heavier gauge wire.
- Create a hook and wrap the wire around the organic.
Carbon filtering Electroforming tank to prevent the build-up of Excess Copper Sludge
- The build-up of copper sludge can cause rough patches or nodulation on the piece being electroformed.
- The build-up of copper sludge can be caused by the chemical makeup of the bath or impure anodes.
- To prevent the build-up of copper sludge, give the bath a proper cleaning and filtration.
- The filtration method: Use activated carbon to filter out the dirty solution by pouring the solution through two regular coffee filters.
- Proper maintenance of equipment and solution can prevent this issue and ensure high-quality electroforming results.
Should I Buy An Electroforming Kit?
There are different ways to get started with electroforming, including purchasing an electroforming kit or making your own solution. In this article, we’ll look at factors to consider when deciding whether to buy an electroforming kit.
Factors to Consider When Deciding to Buy an Electroforming Kit:
Determine the type of objects you want to create:
This factor involves identifying the type of objects you want to produce using electroforming. Different kits may be more suitable for different types of projects, such as jewelry making, artistic creations, or industrial applications. By knowing the type of objects you want to create, you can select a kit that has the right materials, tools, and features to help you achieve your goals.
Have basic knowledge of electroforming and the materials and tools used:
Understanding the basics of electroforming and the materials and tools used in the process is essential when selecting a kit. This knowledge will help you use the kit effectively and make informed decisions about what you need to purchase. A basic understanding of electroforming will also help you troubleshoot problems and get the best results from your kit.
Research different companies offering electroforming kits:
Several companies offer electroforming kits online, such as Rio Grande, Caswell, and Duo Electroforming Kit on Etsy. Researching these companies and comparing their offerings is an important step in selecting the right kit for your needs. Consider factors such as the materials included, the tools provided, and any additional features or accessories.
Choose a kit that is well-suited for your specific needs and level of experience:
The final factor in selecting an electroforming kit involves choosing a kit that is appropriate for your level of experience and meets your specific needs. Consider factors such as the materials included, the tools provided, and any additional features or accessories. It is also important to choose a kit that is easy to use and provides clear instructions. By making an informed decision, you can ensure that you are getting a kit that will help you achieve your desired results.
Some electroforming kits come with a power supply included:
The power supply is an important component in electroforming as it provides the electrical current necessary to deposit metal onto a surface. When researching different electroforming kits, it is important to consider whether or not a power supply is included, as this will affect the cost and ease of use of the kit. If a power supply is not included, you may need to purchase one separately, so be sure to factor this into your budget and plan accordingly.
Purchasing an electroforming kit can be an excellent way to get started with this technique. By considering the factors outlined in this article and making an informed decision, you can ensure that you have the right tools, materials, and resources to achieve your desired results. Before making your purchase, take some time to research and compare different options, and select a kit that is well-suited for your specific needs and level of experience.
Where To Buy Your Electroforming Kits:
If you’re interested in learning about the electroforming technique, one option would be purchasing an electroforming kit this would be a great way to get started. There are several options available for purchasing electroforming kits, each with its features and benefits. In this article, we’ll explore some of the popular places to buy your electroforming kit and provide some tips to help you choose the right one.
- Rio Grande: Rio Grande is a well-known retailer of jewelry-making supplies and offers a range of electroforming kits online. You can find them on their website at https://www.riogrande.com/search-page/?q=electroforming+kit&tab=products
- Etsy: E3 Duo Electroforming Kit is available on Etsy at https://www.etsy.com/listing/295375717/e3-duo-electroforming-kit-et1060-5051. Etsy is a marketplace for handmade and vintage items, and this kit is a great option for those looking for a more personal and unique product.
- Amazon: Two popular options for electroforming kits on Amazon are the Caswell Nickel Electroforming Kit – 3 Gal and the Caswell Nickel Electroforming Kit – 1.5 Gal. You can find them at https://www.amazon.com/Caswell-Nickel-Electroforming-Kit-Gal/dp/B09MR7DR94/ref=sr_1_5?keywords=electroforming+kit&qid=1674159152&sr=8-5 and keywords=electroforming+kit&qid=1674159152&sr=8-6 respectively.
When choosing an electroforming kit, it’s important to consider your specific needs and level of experience.
Make sure to research the different options available, and don’t forget to keep in mind the additional tools and materials you may need to purchase separately.
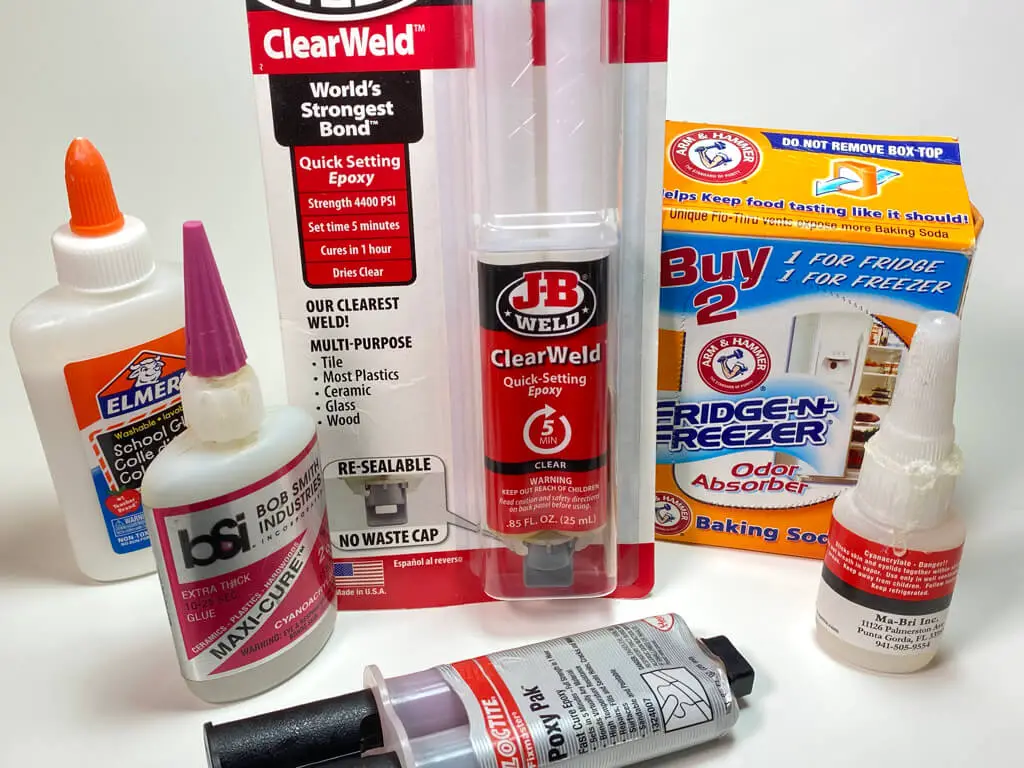
Choosing the Right Glue for Your Jewelry
At some point in our lives, we have all faced the dilemma of finding the perfect adhesive for our jewelry pieces. Whether it’s a broken necklace or a loose earring, finding the best glue for jewelry can be a daunting task. In this article, we will explore the different types of glue available for jewelry making, their advantages, disadvantages, and the factors to consider when choosing the best glue for your jewelry.
Types of Glue for Jewelry Making
Epoxy
Epoxy is a popular adhesive among jewelry makers because of its strong bond and versatility. It is a two-part adhesive that is composed of resin and a hardener. When mixed, the two components create a chemical reaction that results in a strong bond. Epoxy is ideal for bonding metal, plastic, and other materials that are difficult to glue with other adhesives. It dries clear and can be sanded and painted over once it has cured.
| Advantages: | Disadvantages: |
| Strong bond | Requires mixing |
| Versatile | Takes longer to cure than other adhesives |
| Dries clear | |
| Can be sanded and painted over |
Super Glue
Super glue, also known as cyanoacrylate adhesive, is a fast-drying adhesive that is ideal for small jewelry repairs. It bonds quickly and can be used on a variety of materials, including metal, plastic, and ceramic. It dries clear and is waterproof once it has cured.
| Advantages: | Disadvantages: |
| Fast-drying | Not suitable for larger repairs |
| Bonds quickly | Can be brittle and prone to cracking |
| Waterproof |
Jewelry Glue
Jewelry glue is specifically formulated for jewelry making and repairs. It is a clear adhesive that dries quickly and is perfect for bonding delicate materials such as beads, pearls, and rhinestones. It is also waterproof, making it ideal for jewelry that may come into contact with water.
| Advantages: | Disadvantages: |
| Clear adhesive | Not suitable for larger repairs |
| Dries quickly | May not bond well with certain materials |
| Perfect for delicate materials | Factors to Consider When Choosing the Best Glue for Your Jewelry |
| Waterproof |
Type of Jewelry
The type of jewelry you are repairing will determine the type of adhesive you should use. For example, if you are repairing a metal necklace, epoxy or super glue may be the best options. However, if you are repairing a delicate piece of beaded jewelry, jewelry glue may be the best option.
Bond Strength
The strength of the bond required will also play a role in the type of adhesive you choose. If you need a strong bond that can withstand daily wear and tear, epoxy may be the best option. However, if you are repairing a delicate piece of jewelry that will not be subjected to heavy use, jewelry glue may be sufficient.
Drying Time
The drying time of the adhesive may also be a factor to consider. Epoxy takes longer to cure than other adhesives, which may be inconvenient if you need a quick repair. Super glue, on the other hand, dries quickly but may not provide a strong enough bond for larger repairs.
Waterproofing
If you are repairing a piece of jewelry that may come into contact with water, such as a ring or bracelet, you will need an adhesive that is waterproof. Jewelry glue and super glue are both waterproof once they have cured, making them ideal
Appearance
The appearance of the adhesive may also be a factor to consider, especially if the adhesive will be visible on the jewelry. Epoxy and jewelry glue dry clear and are ideal for invisible repairs. Super glue may leave a visible residue, so it may not be suitable for repairs where the adhesive will be visible.
Ease of Use
The ease of use of the adhesive is also an important factor to consider. Some adhesives may require mixing or special application techniques, while others can be applied directly from the tube. Choose an adhesive that is easy to use and will not require a lot of additional tools or equipment.
Conclusion for What Is The Best Glue For Jewelry?
To conclude, selecting the best glue for jewelry repairs can seem overwhelming, but by considering the factors mentioned in this article, it can become a less daunting task. It is essential to take into account the type of jewelry, bond strength, drying time, waterproofing, appearance, and ease of use when choosing the appropriate adhesive.
Epoxy is ideal for bonding metal and other challenging materials, while super glue is perfect for small repairs that require a quick-drying adhesive. On the other hand, jewelry glue is perfect for delicate materials like beads, pearls, and rhinestones. Each adhesive has its own advantages and disadvantages, so it is crucial to choose the one that is most suitable for your specific repair needs.
No matter which adhesive you choose, it is essential to follow the manufacturer’s instructions for the best results. By selecting the appropriate adhesive, you can ensure that your jewelry repairs are robust, long-lasting, and aesthetically pleasing. With the right glue, you can restore your jewelry to its former glory in no time.
Choose the perfect glue for your jewelry and never worry about weak bonds again. I have written a comprehensive blog post that will answer all your questions. What Is The Best Glue For Jewelry?
Essential Techniques for a Professional Electroforming Finish
Jewelry Cleaning
Jewelry is a precious item that adds beauty to our lives. It’s also an investment that we want to protect and keep in good condition. Keeping jewelry clean is a crucial part of maintaining its beauty and preserving its lifespan.
- Jewelry cleaning solution: This is a special cleaning solution formulated to remove dirt and grime from jewelry. It’s important to read the instructions carefully and test the solution on a small, inconspicuous area of the jewelry before using it on the entire piece.
- Warm water and soap: Using warm water and mild soap, such as dish soap, is a simple yet effective way to clean jewelry. Soak the jewelry for a few minutes, gently scrub with a soft-bristled brush, and then rinse and dry thoroughly.
- Baking soda and water: A baking soda and water paste can be used to clean jewelry. Apply the paste to the jewelry, gently scrub with a soft-bristled brush, and then rinse and dry thoroughly.
- Toothpaste: A small amount of toothpaste can be used to clean jewelry. Apply the toothpaste to the jewelry, gently scrub with a soft-bristled brush, and then rinse and dry thoroughly.
- Steam cleaning: This is a professional method that uses high-pressure steam to clean jewelry. This method should be performed by a professional jeweler as it requires specialized equipment.
- Ultrasonic cleaning: Ultrasonic cleaners use high-frequency sound waves to clean jewelry. This method should also be performed by a professional jeweler as it requires specialized equipment. However, some types of jewelry, such as pearls and opals, can be damaged by ultrasonic cleaners, so it’s important to check with a professional before using them.
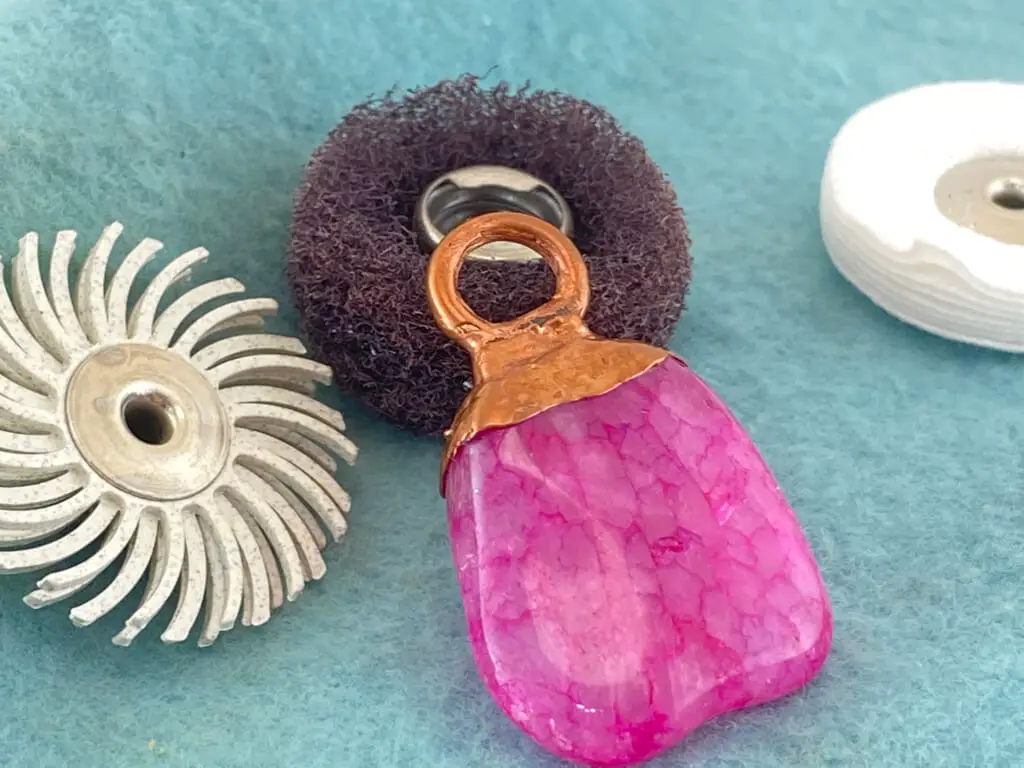
Additional Cleaning Methods
It’s important to choose the right cleaning method for your specific piece of jewelry and to be cautious when using any cleaning solution or method.
It’s recommended to take your jewelry to a professional jeweler for cleaning every 6 months to a year. They can inspect the jewelry for any damage or wear and clean it properly and professionally.
Always dry your jewelry thoroughly and store it properly to protect it from damage. With proper care and cleaning, your jewelry will maintain its beauty and last for many years to come.
Patina is a naturally occurring process that occurs when copper is exposed to the elements, resulting in a change in color and texture.
This process can also be artificially induced using various techniques to achieve a desired aesthetic. Patina finishes for copper jewelry can add depth and character to a piece, making it unique and one-of-a-kind.
Patinas
There are several methods for creating patina finishes, including chemical patina, heat patina, oxidizing patina, and painting patina.
- Chemical Patina: Chemical patina is a process in which a chemical solution is applied to the copper jewelry to produce a desired color change. The most common chemical solutions used for patina include liver of sulfur, copper sulfate, and ammonia. The colors produced by chemical patina can range from blue to green to brown, depending on the chemical solution used. This method is popular among those who want to achieve a specific color or design on their jewelry and is easy to use with consistent results.
- Heat Patina: Heat patina is a process in which heat is applied to the copper jewelry to produce a desired color change. The colors produced by heat patina can range from red to orange to purple and can be achieved using a torch, heat gun, or kiln. This method is great for those who want to add a vibrant, colorful touch to their jewelry and is often used in combination with other patina methods to produce a unique look.
- Oxidizing Patina: Oxidizing patina is a natural process in which oxygen is used to produce a patina on copper jewelry. This is achieved by exposing the jewelry to elements such as air, water, or sunlight. The colors produced by oxidizing patina can vary greatly depending on the environment and the length of exposure, making each piece unique and one of a kind. This method is popular among those who prefer a more natural, organic look and is a great way to add depth and character to a piece of jewelry.
- Painting Patina: painting patina is a process in which paint or ink is used to create a desired patina finish on the copper jewelry. This method is great for those who want a specific color or design on their jewelry and is a great way to add a personal touch to a piece. Whether you want to add a pop of color or a unique design, painting a patina is a versatile method that allows you to achieve your desired look with ease.
Patina finishes for copper jewelry offer numerous benefits and can greatly enhance the beauty and character of a piece. Whether you prefer a natural patina look or a more colorful and vibrant finish, there’s a patina method that’s perfect for your copper jewelry.
It’s important to note that patina finishes will change over time with exposure to the elements, adding to the uniqueness and individuality of each piece. With the various patina methods available, the possibilities for creating stunning and one-of-a-kind pieces of copper jewelry are virtually limitless.
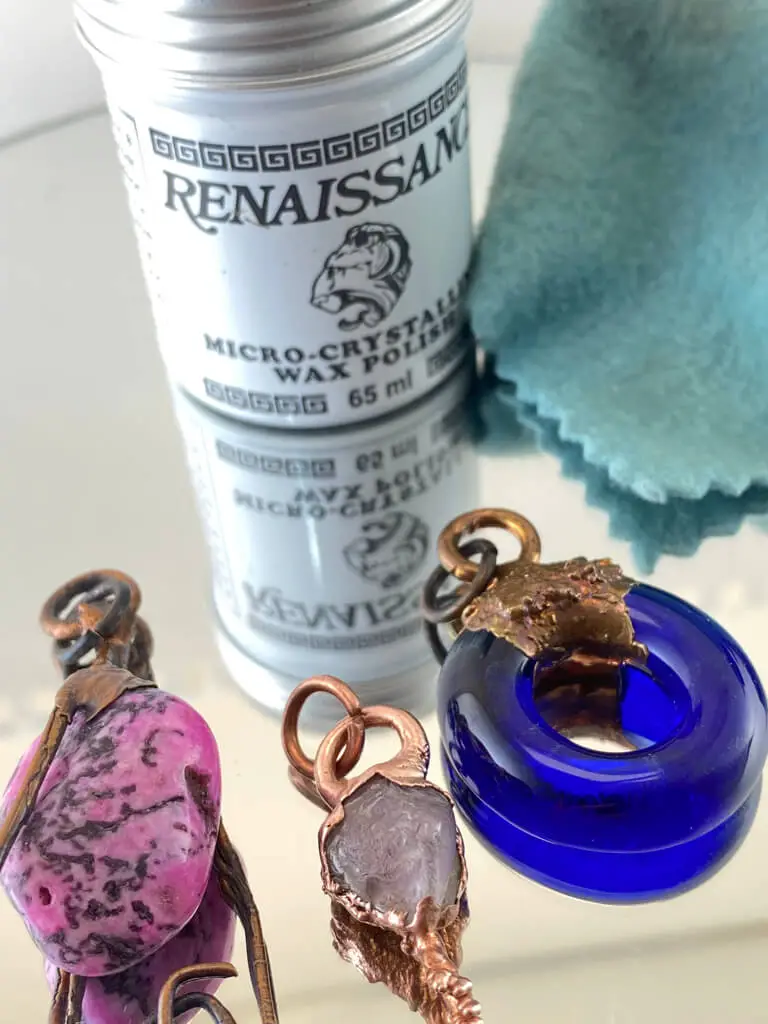
Jewelry Care Tips
Protecting Your Investment:
Copper jewelry has become increasingly popular in recent years, thanks to its natural beauty and versatility. However, copper is also a soft metal that can easily tarnish and discolor over time. That’s why it’s important to understand the different methods for sealing copper jewelry, and how to choose the right one for your needs. In this article, I will provide a comprehensive overview of the various sealing options available, including their pros and cons and tips for application.
Copper Jewelry Sealing:
Copper jewelry sealing is the process of applying a protective barrier to the surface of the jewelry, to slow down the tarnishing process and prolong its lifespan. This can be accomplished through a variety of methods, such as clear coat sealant, wax sealant, lacquer sealant, and acrylic sealant.
Clear Coat Sealant:
Clear coat sealant is a liquid solution that is applied to the surface of copper jewelry. Once it dries, it forms a protective barrier that helps to prevent tarnish and discoloration. Clear coat sealant is readily available in most craft stores and can be applied using a brush or spray bottle.
One of the biggest advantages of clear coat sealant is that it is easy to apply and dries quickly. However, it is also the least durable of the sealing options and may need to be reapplied more frequently.
Wax sealant:
Wax sealant is a solid wax that is applied to the surface of copper jewelry. It forms a protective barrier that helps to prevent tarnish and discoloration. Wax sealant can be found in most craft stores and can be applied using a soft cloth or brush.
Wax sealant is a good option for those who want a more natural look to their jewelry, as it does not have a shiny or glossy finish. However, it can be more difficult to apply evenly and may need to be reapplied more frequently.
Lacquer Sealant:
Lacquer sealant is a liquid solution that is applied to the surface of the copper jewelry, once it dries it forms a protective barrier that helps to prevent tarnish and discoloration. Lacquer sealant is a more durable and long-lasting option than clear coat sealant or wax sealant.
Lacquer sealant is ideal for those who want a glossy, polished look to their jewelry, as it dries with a shiny finish. However, it can be more difficult to apply and may require multiple coats for full protection.
Acrylic Sealant:
Acrylic sealant is a liquid solution that is applied to the surface of the copper jewelry, once it dries it forms a protective barrier that helps to prevent tarnish and discoloration. Acrylic sealant is a more durable and long-lasting option than clear coat sealant or wax sealant.
Acrylic sealant is a good choice for those who want a glossy, polished look to their jewelry, and who don’t mind the slightly artificial appearance of the material. It is also relatively easy to apply and dries quickly.
Choosing the Right Sealing Method for Your Copper Jewelry
When it comes to sealing your copper jewelry, the right method will depend on your personal preferences, as well as the type and design of the jewelry. Consider the following factors when making your decision:
- Durability: How long do you want the protection to last? If you want a long-lasting solution, consider lacquer or acrylic sealant. If you’re looking for something more temporary, a clear coat or wax sealant may be a better choice.
- Appearance: What kind of look are you going for? Clear coat sealant and lacquer sealant provide a clear, glossy finish, while wax sealant can offer a more natural, matte look. If you have intricate designs or patterns in your jewelry, you may want to choose a sealant that won’t affect the appearance of the metal.
- Ease of Application: How important is it for the application process to be quick and easy? Clear coat and lacquer sealants can be applied with a brush or spray bottle, while wax sealant requires a bit more effort and may need to be applied with a soft cloth or brush.
- Environmental Factors: Will your jewelry be exposed to extreme temperatures or moisture? If so, you may want to choose a sealant that is more durable and able to withstand these conditions.
Taking the time to consider these factors will help you choose the right sealing method for your copper jewelry. But even with the best sealing method, it’s important to keep in mind that regular cleaning and maintenance will still be necessary to keep your jewelry looking its best. Regular cleaning helps to remove dirt and grime buildup that can dull the shine and cause discoloration over time.
It’s recommended to clean your copper jewelry using a soft cloth and a mild soap solution and then dry it thoroughly to prevent water spots. Additionally, it’s important to store copper jewelry in a dry place to prevent tarnishing and to avoid exposing it to harsh chemicals or extreme temperatures. By taking proper care of your copper jewelry, you can help it maintain its beauty and durability for many years to come.
Jewelry Box to protect your jewelry
A jewelry box is more than just a stylish accessory to store your jewelry collection. It is an essential item for anyone who values their precious pieces. A quality jewelry box provides several benefits that help protect your jewelry from damage and environmental factors.
One of the main benefits of a jewelry box is preventing scratches and damage to your jewelry. When left loose in a drawer or on a surface, jewelry can easily become tangled, scratched, or even broken. A jewelry box with soft, padded interiors provides a safe and secure place to store your jewelry, preventing it from rubbing against other pieces and causing damage. Choosing a jewelry box with compartments and individual slots for each piece will also help prevent scratches and dings.
Another benefit of a jewelry box is avoiding tarnishing and oxidation. Certain metals used to make jewelry, such as silver and copper, can tarnish and oxidize over time due to exposure to air and moisture. A jewelry box with an anti-tarnish lining can create a dry environment that helps prevent this from happening. The lining is typically made of special materials, such as charcoal or silica gel, that absorb moisture and sulfur gases, which cause the tarnishing of the jewelry. Check out the Anti-Tarnish Jewelry Storage System.
In conclusion, a jewelry box is an essential accessory for anyone who values their jewelry collection. It not only keeps your jewelry organized but also provides several benefits to protect your jewelry from damage, and environmental factors, preventing scratches and damage to your jewelry, and helping prevent tarnishing and oxidation. A quality jewelry box is an investment that will help preserve the quality and lifespan of your jewelry collection for years to come.
I have just scratched the surface explaining why having a quality jewelry box will protect your valuable jewelry. I have written an entire blog post that covers all the aspects of having a quality jewelry box CHECK IT OUT.
Advantages And Disadvantages Of Electroforming:
The Advantages of Electroforming for Hobbyists
As a hobbyist, you are always looking for ways to improve your craft and create stunning pieces of jewelry, figurines, and other decorative items. Electroforming is a popular technique that provides several benefits that make it an ideal choice for hobbyists. Here, we will explore the advantages of electroforming through the eyes of a hobbyist.
- High Precision and Detail: One of the main advantages of electroforming is the high level of precision and detail it allows. With this technique, hobbyists can create intricate designs and patterns that would be difficult to achieve through other methods. This makes electroforming an excellent choice for those who want to create truly unique and special pieces.
- Versatility: Another advantage of electroforming is its versatility. This technique can be used with a variety of different metals, including gold, silver, copper, nickel, and other alloys. This allows hobbyists to experiment with different metals and alloys and find the perfect material for their projects. Additionally, electroforming can be used to create objects of varying sizes and shapes, making it a versatile technique for hobbyists to use.
- Cost-effective: One of the biggest benefits of electroforming for hobbyists is its cost-effectiveness. This technique is much more affordable than other methods, such as casting or engraving, as it does not require the use of expensive molds or tools. This makes electroforming a cost-effective option for hobbyists who are looking to create metal objects without breaking the bank.
- Efficiency: Another benefit of electroforming is its efficiency. This technique is a relatively fast process, which can be completed in a shorter time than other methods of creating metal objects. This allows hobbyists to create multiple pieces in a shorter period, saving them time and allowing them to focus on other aspects of their craft.
- Personalization: Finally, electroforming allows hobbyists to create personalized pieces that are truly unique and special. Whether you want to create a piece of jewelry for yourself or for a loved one, electroforming gives you the ability to create a truly one-of-a-kind piece. With this technique, hobbyists can create pieces that reflect their personal style and creativity, making electroforming an excellent choice for those who want to create truly personal and special pieces.
In conclusion, electroforming is an excellent technique for hobbyists who want to create high-precision, versatile, cost-effective, efficient, and personalized pieces. Whether you are a seasoned hobbyist or just starting, electroforming is a technique that is worth considering. With its many benefits, this technique is sure to help you create stunning pieces that will be treasured for years to come.
The Disadvantages of Electroforming
As a hobbyist, you may be interested in exploring the exciting and versatile world of electroforming. This unique process has a wide range of practical applications, making it perfect for those who love to create and experiment. Whether you’re interested in jewelry making, replicating objects, sculpture, or art, electroforming offers you the opportunity to bring your ideas to life. I will dive into the practical applications of electroforming for hobbyists and explore how you can get started with this fascinating process.
- Complexity: The electroforming process can be complex and time-consuming, requiring a thorough understanding of the materials and tools used. This can be challenging for hobbyists who are new to the process, as the techniques and equipment involved can be difficult to master. Moreover, the process requires patience and precision, as mistakes can be difficult to correct.
- Safety Concerns: When electroforming, it is important to handle chemicals, electrical current, and heat with care, as they can be dangerous if not properly managed. For example, chemicals used in electroforming can be toxic and may cause harm to the skin and eyes. Additionally, electrical current and heat can pose a fire risk and should be monitored closely to prevent accidents.
- Limited Size: The size of the object that can be electroformed is limited by the size of the container and the electrical equipment used in the process. This can be challenging for hobbyists who want to create larger pieces, as the equipment and containers used for electroforming may not be large enough to accommodate the desired size.
- Surface Finish: Electroforming can result in an uneven surface finish on the object, which may require additional polishing or finishing to achieve a smooth surface. This can be a time-consuming and challenging process, especially for hobbyists who are new to the technique.
- Equipment and Materials Cost: Electroforming requires specialized equipment and materials, which can be expensive for hobbyists. The cost of the equipment and materials can add up quickly, making electroforming a more costly hobby than others.
In conclusion, electroforming can be an exciting and rewarding hobby for those interested in creating unique and intricate metal objects of art. However, it is important to consider the disadvantages of electroforming, such as the complexity of the process, safety concerns, limited size, surface finish, and equipment and materials cost. Hobbyists should carefully weigh these factors before deciding to pursue electroforming as a hobby.
Click the link for comprehensive in-depth information and take your understanding of the Advantages And Disadvantages Of Electroforming “Nothing Held Back” to the next level.
What Are The Practical Applications Of The Electroforming Process?
The electroforming process has a variety of practical applications, making it a great option for hobbyists and small business owners alike. In this article, I will explore the various applications of electroforming and how it can be used to create a wide range of objects.
- Jewelry Making with Electroforming: Electroforming is often used to create unique and detailed pieces of jewelry, such as pendants and earrings. This process allows for intricate designs to be replicated with accuracy and precision, creating pieces that are not only beautiful but also durable. The metal deposited through electroforming can be any type of metal, including copper, silver, and gold, making it possible to create jewelry in a variety of finishes and styles.
- Replicating Objects through Electroforming: Another practical application of electroforming is the ability to create exact replicas of small objects, such as shells, coins, or fossils. This process is ideal for those who want to replicate an object for personal use or display purposes. The electroformed replica can be made from a variety of metals, giving it the ability to withstand wear and tear, and making it a durable piece for long-term use.
- Creating Sculptures with Electroforming: Sculpture is another area where electroforming can be used. The process of depositing metal onto a mold or sculpture creates a finished product that is both beautiful and durable. This process is ideal for artists and sculptors who want to create pieces that are not only aesthetically pleasing but also long-lasting. Electroforming can be used to create sculptures in a variety of metals, allowing for a range of styles and finishes.
- Art through Electroforming: Finally, electroforming can be used to create art by depositing metal onto non-conductive surfaces like paper, wood, or glass. This process allows artists to create unique and beautiful pieces that are not only aesthetically pleasing but also durable. The electroformed art can be created in a variety of metals, giving it the ability to withstand wear and tear, and making it a long-lasting piece for display.
In conclusion, electroforming is a versatile process that offers a wide range of practical applications. From jewelry making to replicating objects, sculpture creation, and art, electroforming is a process that can be used by hobbyists and small business owners alike. The ability to deposit metal onto non-conductive surfaces through the use of electrical currents makes electroforming a unique and valuable process for those looking to create beautiful and durable objects.
Electroformed Adornment: A Guide to Beautiful and Unique Jewelry
Why Do We Add Crystals And Gemstones to our Electroformed Jewelry?
The electroforming process allows for creativity and flexibility, leading to the creation of unique and beautiful jewelry pieces.
One of the popular trends in electroformed jewelry is the addition of crystals and gemstones to the pieces. These natural elements bring not only a stunning visual appeal to the jewelry but also various benefits such as healing properties and personalization. In this article, I will explore the reasons why electroformed jewelry is enhanced by the addition of crystals and gemstones.
- Aesthetics: Adding Visual Appeal to Electroformed Jewelry Crystals and gemstones add a beautiful and unique look to electroformed jewelry, making it more eye-catching and desirable. The natural and shimmering appearance of these elements can complement and enhance the intricate designs created through electroforming. With a wide range of colors, shapes, and sizes to choose from, it is easy to find the perfect crystals and gemstones to match any design concept.
- Healing Properties: Enhancing Well-Being with Electroformed Jewelry Many people believe that crystals and gemstones have healing properties that can benefit the wearer in various ways. The use of these elements in electroformed jewelry allows the wearer to enjoy the benefits of these healing properties throughout the day. For example, amethyst is believed to calm the mind and reduce stress, while rose quartz is associated with love and emotional healing. By incorporating specific crystals and gemstones into the jewelry, the wearer can choose the properties that align with their personal needs and beliefs.
- Personalizing and Protecting with Crystals and Gemstones: Have you ever considered adding a personal touch to your jewelry by incorporating specific crystals or gemstones? Not only can this make a piece more meaningful to the wearer, but it can also provide a sense of protection from negative energy. In this article, I will delve into the world of crystals and gemstones, exploring how they can be used to add a personal touch and offer protection to jewelry.
- Offering Protection with Crystals and Gemstones: In addition to adding personalization, incorporating crystals and gemstones into jewelry can also provide a sense of protection from negative energy. Certain stones are believed to offer protective qualities, such as black tourmaline, which is said to absorb and deflect negative energy, or hematite, which is believed to provide stability and grounding. By wearing jewelry with these protective stones, you can feel more secure and protected from negative energy, both physically and emotionally.
- Choosing the Right Crystals and Gemstones for Your Jewelry: With so many different crystals and gemstones available, it can be overwhelming to choose the right ones for your jewelry. The best way to select stones is to consider your personal preferences and the specific qualities you are looking to incorporate into your life. You can also consult with a professional crystal healer or gemologist for guidance and advice on which stones may be best for you.
You can choose from a variety of jewelry styles, such as necklaces, bracelets, earrings, and more, and select the stones that resonate with you. Whether you prefer the simplicity of a single stone or the bold statement of multiple stones, the possibilities are endless when it comes to incorporating crystals and gemstones into your jewelry.
Uses of crystals and gemstones in electroformed jewelry:
- Necklaces: Crystals and gemstones can be added to pendants or hung from chains to create beautiful and unique necklace designs.
- Earrings: Adding crystals and gemstones to earrings can make them stand out and add a touch of elegance to any outfit.
- Rings: Incorporating crystals and gemstones into ring designs can add a unique and personal touch to the piece.
- Bracelets: Crystals and gemstones can be added to bangles or strung onto the elastic cord to create beautiful and meaningful bracelets.
Crystals and Gemstones Energy Fashion Statement
- Cultural significance: Crystals and gemstones have been used in many cultures throughout history for their spiritual and religious significance. Adding them to jewelry can also honor and pay respect to cultural traditions.
- Energy: Crystals and gemstones are believed to have unique energy vibrations that can influence the energy of the wearer. Adding them to jewelry can help to balance and align the energy of the person wearing it.
- Symbolism: Certain crystals and gemstones have symbolic meanings, such as love, prosperity, and peace, and adding them to jewelry can represent these ideals and serve as a reminder to the wearer.
- Fashion statement: Crystals and gemstones can add a fashionable and trendy touch to jewelry, making them stand out and on-trend.
- Preservation of natural resources: Some crystals and gemstones are becoming rare and hard to find. Incorporating them into jewelry can help preserve these natural resources and make them more accessible.
Certain gemstones are associated with specific birth months and are often given as gifts for birthdays. These are known as birthstones.
Most common birthstones and the corresponding birth months:
January: Garnet February: Amethyst March: Aquamarine or Bloodstone April: Diamond May: Emerald June: Pearl, Moonstone or Alexandrite July: Ruby August: Peridot September: Sapphire October: Opal or Tourmaline November: Topaz or Citrine December: Turquoise, Zircon or Tanzanite
Please note that the birthstone tradition varies across cultures and some cultures might have different birthstones associated with certain months.
The addition of crystals and gemstones to electroformed jewelry adds beauty and meaning to the pieces. From the healing properties of certain gemstones to the personalization of a specific crystal, there are many reasons and uses for incorporating these natural elements into electroforming jewelry.
Whether it’s for aesthetic, healing, personalization, or protection, crystals, and gemstones can be an important addition to any piece of electroforming jewelry.
What is the Mohs Hardness Scale and Why Use It?
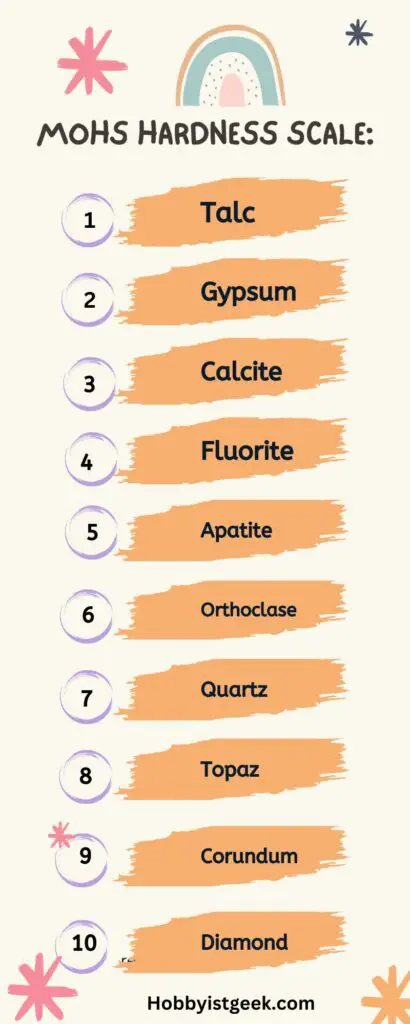
Using the Mohs hardness scale is important in many industries, including gemology, geology, and mineralogy. It allows for a standardized method of measuring the hardness of a mineral and helps to identify it.
In the jewelry industry, the Mohs hardness scale is particularly useful as it helps to determine the durability of a gemstone. When selecting gemstones for jewelry, it’s important to choose one with a high enough hardness to withstand daily wear and tear. Gemstones with a hardness of 7 or higher are typically considered suitable for jewelry.
In the mining industry, the Mohs hardness scale is used to identify minerals and to determine their suitability for use in different industrial applications. Harder minerals are often preferred for use in abrasive products, while softer minerals may be more suitable for use in construction materials.
In addition to its practical applications, the Mohs hardness scale also has educational value. It helps to illustrate the differences between minerals and provides a simple method for comparing their relative hardness.
Overall, the Mohs hardness scale is an essential tool for anyone working with minerals and gemstones. It provides a convenient and standardized way of measuring the hardness of a mineral, making it a valuable resource in a wide range of industries.
The Mohs Hardness Scale:
- Talc
- Gypsum
- Calcite
- Fluorite
- Apatite
- Orthoclase
- Quartz
- Topaz
- Corundum
- Diamond
The durability of Gemstones for Hobbyists:
Hardness determines durability: The hardness of a gemstone can indicate how well it will hold up over time, with harder gemstones being more durable and less prone to scratches or chips.
Examples of hard gemstones: Diamonds (Mohs scale 10) and sapphires (Mohs scale 9) are examples of hard gemstones that are suitable for everyday wear.
Examples of soft gemstones: Softer gemstones, such as opals (Mohs scale 5.5-6.5) and pearls (Mohs scale 2.5-4.5), are more delicate and need to be handled with care.
- Crystals from being damaged, you must apply a special covering called a sealant on them. This is important for gemstones and crystals that are not very hard, which we can tell by using the Mohs scale. If it’s below 7, it needs a sealant applied for protection.
- Setting of Gemstones for Hobbyists: Hardness affects setting type: The hardness of a gemstone can also determine the type of setting that is most appropriate. Hard gemstones: Harder gemstones, such as diamonds, can be set with prongs or bezel settings.Soft gemstones: Softer gemstones may need to be set in a protective or cushion setting to prevent damage.
- Polishing of Gemstones for Hobbyists: Hardness affects the polishing process: The hardness of a gemstone can also affect the polishing process. Hard gemstones: Harder gemstones, such as diamonds, can be polished with diamond abrasives. Soft gemstones: Softer gemstones, such as pearls, may need to be polished with gentler abrasives to avoid damage.
- Cleaning of Gemstones for Hobbyists: Hardness affects cleaning method: Knowing the hardness of a gemstone can also help in determining the best cleaning method. Hard gemstones: Harder gemstones, such as diamonds, can be cleaned with ultrasonic cleaners or steam cleaners. Soft gemstones: Softer gemstones may need to be cleaned with a soft brush and mild detergent to avoid damage.
Electroforming Projects:
How to Electroform Insects: A Step-by-Step Guide
Electroforming is a technique that uses electrical currents to deposit metal onto a conductive surface. This process can be used to create intricate metal sculptures and other decorative items, including insects.
I will guide you through the process of electroforming insects step by step.
What Materials Do You Need for Electroforming Insects?
- Copper sulfate electroforming solution
- Pure copper wire
- DC power source
- Beaker or another container
- Insect specimen
- Conductive paint
- Clear coat spray
Step By Step Guide For Electroforming Insects:
Step 1: Prepare the Insect Specimen:
The first step in electroforming insects is to prepare the specimen. This involves cleaning the insect and applying conductive paint to its surface. Clean the insect thoroughly and remove any dirt, debris, or oils from its surface. Then, use a brush to apply a thin layer of conductive paint to the surface of the insect. Be sure to cover all surfaces, including the legs and antennae, with paint.
Step 2: Create the Electrolyte Solution
Next, you’ll need to create the electrolyte solution. This solution will be used to deposit metal onto the surface of the insect. To create the solution, dissolve copper sulfate in water in a beaker or other container. The concentration of copper sulfate in the solution should be around 25 grams per liter.
Step 3: Attach the Power Source
Once the electrolyte solution has been prepared, attach the DC power source to the pure copper wire. Place the wire into the solution and connect the other end of the wire to the positive terminal of the power source. The positive terminal should be connected to the insect specimen, which has been coated with conductive paint.
Step 4: Start the Electroforming Process
With the power source connected, you can start the electroforming process. Turn on the power source and allow it to run for several hours. During this time, electrical currents will pass through the electrolyte solution and deposit metal onto the surface of the insect specimen.
Step 5: Monitor the Process
It’s important to monitor the electroforming process regularly to ensure that the metal is depositing evenly on the insect specimen. You may need to adjust the power source or the concentration of copper sulfate in the solution to achieve the desired result. Be patient and allow the process to continue until the desired thickness of metal has been achieved.
Step 6: Finish the Electroformed Insect
Once the desired thickness of metal has been achieved, turn off the power source and remove the insect specimen from the solution. Clean the specimen thoroughly and allow it to dry. Finally, apply a clear coat spray to protect the metal surface and preserve the insect’s detail.
Conclusion For Electroforming Insects
Electroforming insects is a complex process that requires patience, precision, and a good understanding of electrical currents. By following the steps outlined in this guide, you can create beautiful metal insects that will last for years to come. Whether you’re a professional artist or a hobbyist, electroforming is a unique and rewarding process that will bring your insect specimens to life.
FAQs for How to Electroform Insects:
Insects and bugs can be a great source of inspiration for electroforming projects.
One of the best places to find insects and bugs for electroforming is in nature. Many insects and bugs can be found in gardens, parks, and forests. Some popular insects and bugs for electroforming include beetles, butterflies, and dragonflies.
Another great place to find insects and bugs for electroforming is at entomological supply companies. These companies specialize in selling preserved insects and bugs for scientific and artistic purposes. The insects and bugs sold by these companies are often of high quality and can be used for a variety of projects, including electroforming.
Online marketplaces such as Amazon and Etsy are also great places to find insects and bugs for electroforming. These marketplaces offer a wide variety of insects and bugs, including many rare and exotic species.
It is important to note that when collecting insects and bugs from nature, it is important to do so ethically and sustainably. This means avoiding collecting endangered species or taking more than is needed for a project.
In conclusion, insects and bugs can be a great source of inspiration for electroforming projects. Some great places to find insects and bugs for electroforming include nature, entomological supply companies, and online marketplaces. It is important to collect insects and bugs ethically and sustainably. Happy electroforming!
Where To Find Insects And Bugs For Electroforming
- Nature: One of the most exciting and rewarding places to find insects and bugs for electroforming is in nature. Whether you’re exploring your local park, garden, or forest, you’re bound to come across plenty of interesting insects and bugs. For example, you might find a stunning monarch butterfly flitting from flower to flower or a beautiful beetle with intricate patterns on its wings. You can collect insects from nature, but make sure you do so ethically and sustainably.
- Entomological Supply Companies: If you’re looking for a more reliable and consistent source of high-quality insects and bugs for electroforming, then entomological supply companies are the way to go. These companies specialize in selling preserved insects and bugs for scientific and artistic purposes, and they often have a wide range of species available. From rare and exotic butterflies to common garden pests, you’re sure to find something that catches your eye.
- Online Marketplaces: For those who prefer to shop from the comfort of their own home, online marketplaces such as Amazon and Etsy are great options. These marketplaces offer a vast array of insects and bugs from all over the world, so you’re sure to find something that meets your needs. Whether you’re looking for a rare and exotic species or simply want a larger quantity of a common insect, you’re sure to find it on one of these platforms.
Conclusion Electroforming Insects And Bugs:
In conclusion, insects and bugs are a fantastic source of inspiration for electroforming projects, and there are plenty of options available to you when it comes to finding the perfect specimens. Whether you prefer to collect insects from nature, purchase them from entomological supply companies, or shop online, there’s no shortage of options available. So, what are you waiting for? Start your insect and bug-hunting journey today!
Yes, purchasing insects and bugs from entomological supply companies and online marketplaces are ethical as long as they are responsibly sourced and preserved.
If you’re looking for high-quality insects and bugs for your electroforming projects, there are several online companies you can consider. Here are a few examples:
BioQuip: https://www.bioquip.com/ – BioQuip is a well-established entomological supply company that offers a wide variety of insects and bugs for scientific and artistic purposes, including electroforming.
Insect World: https://www.insectworld.com/ – Insect World offers a wide selection of preserved insects and bugs, as well as live insects and bugs. They also offer custom electroforming services.
Insect Lore: https://www.insectlore.com/ – Insect Lore specializes in live insects and bug kits, but also offers a selection of preserved insects and bugs for sale.
The Bugmaniac: https://www.thebugmaniac.com/ – The Bugmaniac is a trusted source for high-quality insects and bugs for electroforming and other purposes. They offer a wide variety of species and custom services.
Specimen Supply Co: https://www.specimensupply.com/ – Specimen Supply Co is an online entomological supply company that offers a wide variety of preserved insects and bugs for scientific and artistic purposes, including electroforming.
Note that this is not an exhaustive list and many other online companies offer high-quality insects and bugs for electroforming. Before making a purchase, it’s important to research each company and read customer reviews to ensure you’re getting the best quality insects and bugs for your project.
Electroforming a Copper Ring A Step-by-Step guide:
Gather materials For Electroforming a Copper Ring:
- Copper electroforming solution
- A power supply
- A container to hold the solution
- A copper ring shank.
- A copper anode
- A cathode, such as a very thin copper wire to connect the ring
- A crystal
- Conductive paint
- Epoxy or another adhesive
- Protective gloves and goggles
Instructions For Electroforming a Copper Ring Step By Step:
- Prepare the solution: If you haven’t completed this mix the copper electroforming solution according to the manufacturer’s instructions and pour it into the container.
- Prepare the ring: Clean the ring shank thoroughly to remove any dirt or oils.
- Place the crystal on the ring: Using the epoxy or adhesive, attach the crystal to the ring shank.
- Apply conductive paint: Brush a thin layer of conductive paint around the crystal and the ring shank. This will ensure that the copper is evenly distributed around the crystal.
- Set up the power supply: Attach the positive lead to the piece you are electroforming and the negative lead to the metal (copper) you will be electroforming. Place the piece in the electroforming solution, making sure it is completely submerged.
- Calculate the surface area and Amps for electroforming (Explained earlier)
- Make sure the power supply is set to the correct voltage and amperage for the size of your piece.
- Place the ring in the solution: The ring components must be completely dry. I usually wait overnight for glue and conductive paint to dry. Submerge the ring in the solution and connect it to the cathode.
- Electroform the ring: Turn on the power supply and let the solution run for the recommended time, usually several hours. The copper ions in the solution will slowly be attracted to the ring.
- Polishing, Patinas & Finishes Noted above
My Final Thoughts On “Electroforming: The Ultimate Guide“
In conclusion, as the author of “Electroforming: The Ultimate Guide,” I am honored to have compiled this comprehensive guide that provides an in-depth look into the fascinating world of electroforming.
My objective was to furnish every one of you with the necessary tools and information you need to embark on your own electroforming projects and craft one-of-a-kind, breathtaking pieces of jewelry and art.
This book delves into every aspect of the electroforming process, including the materials, equipment, and techniques that are required to achieve different outcomes. It highlights the versatility of electroforming, showcasing its versatility and versatility for a wide range of applications, from jewelry making to sculpting.
With my easy-to-follow instructions, expert tips, and stunning examples of completed projects, I hope to spark the creativity of all my readers and encourage them to explore the limitless potential of electroforming.
This article covers both the technical and artistic aspects of electroforming, making it an indispensable guide for anyone who wants to delve into this cutting-edge and innovative art form.
I am confident that “Electroforming: The Ultimate Guide” will serve as a valuable resource for anyone seeking to revolutionize their jewelry-making techniques and unleash their creative potential with the power of electroforming.
Electroforming Resources Check Them Out!
Our electroforming resources page is full of helpful products that will save you time, money, and frustration. Click on the link and start exploring!
Please support us by following us on FaceBook
Want to be part of our community of like-minded hobbyists who love electroforming? Click on the link! Sign up for our email list today!
- Jewelry Making Ideas: Seasonal Crystal Trends That Command Premium Prices - May 31, 2025
- Evil Eye Hand: Unveiling the Mystical Origins and Meanings - February 2, 2024
- Amegreen Amethyst Meaning: Discover the Hidden Magic! - February 2, 2024

