How To Electroform Insects? | Step By Step | 2023
How To Electroform Insects?
We are going to cover how to electroform insects?
Are you ready to take your electroforming skills to the next level, and are you looking for the perfect display piece to show to your friends?
Then you’ll definitely be interested in electroforming insects!
At first glance, you might be slightly grossed out by this idea, but the final results will convince you otherwise.
By electroforming insects, we can immortalize the beauty of nature and represent once-living creatures in ways never seen before!
In this article, we’ll walk you through the entire process of electroforming insects, and by the end, you’ll be left with immortalized pieces of stunning nature!
The Answer To The Question… How To Electroform Insects?
How to electroform insects?
Insects can be electroformed much like other objects can, insects can provide some more difficulty as they’re quite small and oddly shaped.
The normal electroforming principles still apply though, find the insects, prepare them for electroforming, determine its approximate surface area, and let your electroforming setup do its magic!
In this article, we’ll go into more detail on the different aspects of this process!
Electroforming small natural objects like insects is a great way of improving your overall electroforming skills, and further, develop yourself as an artist.
Working with things like insects makes you appreciate the intricacies of Mother Nature and it allows you to immortalize them in a stunning manner!
So, without further ado, let’s jump straight in shall we!
Where To Find Insects And Bugs For Electroforming?
Obviously, our first challenge in this project starts right away, as where are we supposed to get these insects from?
It’s not like you come across a couple of perfect dead insects every day!
Depending on where you live, and the time of year, finding the appropriate bugs for a project like this might be quite challenging.
Luckily, insects are always there, we just need to know where to look to find them!
Insects and bugs have the tendency to live in dark and moist places.
This means that looking in a pile of moist wood or lifting a few rocks in your backyard will most likely yield some perfectly usable insects!
If you’re not a fan of getting dirty and killing live insects, don’t worry!
Believe it or not, insects can also be bought online!
A webshop like https://www.insects4sale.com/ sells many different species of insects, ranging from your average housefly to rare specimens, perfect for our project!
Choosing Your Specimen
Now that we know where to find the bugs we need for our electroforming adventure, we need to start selecting the right ones to use!
There are many different species we can use to electroform, but there are some criteria that need to be matched to achieve the optimal results.
Insects and bugs are small and delicate objects and thus need to be handled with care and we should be sure to select the strongest ones to survive the ordeal that we’re putting them through!
In order to achieve the best results possible, we need to look for smooth and strong specimens.
Often, these characteristics can be found in bugs with a hard exoskeleton, such as beetles.
The exoskeleton provides a solid base for the metal surface to form around it.
We also want to be wary of insects with long and thin limbs, as these are easy to break, and missing limbs will ruin the look of our final result.
Finally, we should stay clear of particularly hairy species of insects as the hairs will prevent the metal surface from properly forming, however experimenting with these types of bugs or insects can create interesting results!
Furthermore, it’s not a necessity, but it can make life easier for us later on, try to select the biggest specimens you find as they’re generally easier to work with!
Re-Hydrating Process And Relaxing The Specimen
We selected our specimens for the job, it’s best to pin them immediately after sourcing our specimens, as this removes the need for relaxing and re-hydrating our bugs.
For more information on pinning your specimen see the subheading “Anchoring, Posing and Pinning”.
If, however, we bought our bugs online or we left them for too long, they’ll have dried up, in this case, we’ll need to use a technique called relaxing or re-hydrating to recover our fresh insects!
What is the re-hydrating process?
The re-hydrating process is the process of hydrating a dried specimen, this is an important step we have to take before we can start our electroforming process, this is especially important if you bought your specimens online, as they’ll arrive completely dried.
The process goes as follows, take a plastic box with a cover.
After that take some damp paper towels and place them all around the bottom of the box, after that pour some alcohol in the relaxing chamber to prevent mold from forming, now it’s time to add our dry specimens.
Place a second plastic container within the box and place your specimens in there.
The key thing is that our insects don’t get wet, the environment should be very moist, but there shouldn’t be any direct contact with the water!
After that let it stand for 12-24 hours.
After 12 hours, check on the specimens, you’ll know when they’ve re-hydrated if all their moving parts move appropriately and if they feel as though they’re fresh specimens!
When you’re done, you’re ready to move on to the next step!
Preparing Organics
Now, we’re ready to start our electroforming process. As usual, we’ll first need to prepare our specimens, but this time we’re dealing with organic specimens, such as leaves or flowers, which might take a little more preparation.
For this step, we’ll need to dry our specimen again.
We need to take this step to avoid things like wilting as this will dramatically increase the difficulty of the further preparation steps, doing this also prevents internal rotting within the final result, which, as you can imagine, can cause a nasty smell and possibly a complete failure of the piece!
So, how do we dry our pieces?
There are multiple methods that we might use to dry our leaves and flowers, but the easiest, yet slowest, is called press drying.
As the name suggests, press drying involves pressing our pieces in an old book for example, close to the book and tie it firmly using something like a belt and let it sit!
Another faster, method is known as iron drying, once again the name speaks for itself.
This method involves using an iron at low temperature, place the specimen between two pieces of paper to prevent burns and iron away!
After the drying process, you should be left with dried-out bugs or insects, now you’re ready to move on to the next step!
Anchoring, Posing, And Pinning Our Bugs And Insects
Now that we’ve relaxed our specimen, we’re ready to enter the next step in the process.
In this step, we’ll pin our specimen for display. Before we get to the pinning process, we’ll need to make sure the relaxing process did its job.
See if your insect feels fresh and movable, and not dry and fragile.
For more information on how to relax, or rehydrate your specimen see the subheading “Re-hydrating process and relaxing the specimen”!
Now we’re ready for the pinning, take an insect pin, or a sharp needle, and place it on the thorax, this is the area between the body and the head, of the insect.
Put the pin all the way through the body and into a, preferably Styrofoam, board.
Now that the insect is secured, we can start posing it to our liking.
Carefully start moving the limbs or the antennae of the insect to your desired position.
The moving parts of your insect or bug will be very fragile at this point so handle them with the appropriate care!
Use pins to carefully move and support your insect or bug into the desired position.
Once our insect has the desired pose, we’ll need to carefully remove the pins we used to position the insect, after that we can continue to the sealing process.
Sealing The Specimen (Insects And Organics)
We’re now ready to continue with our regular electroforming steps, starting of course with sealing our specimens. Sealing our insects is necessary to make them waterproof to prevent them from dissolving or deforming when placed in the electroforming bath.
For this sealing process we use chemicals called sealants, there are many different sealant types available and generally, we would be using a simple bottle of ModPodge, which is available online and in most hobby stores, but when working with delicate objects like insects it’ll be better to use a more sophisticated substance such Acrylic sealer!
In order to apply this sealant, we can either submerge it gently under a layer of the chosen sealant, or we can use a paintbrush to apply multiple layers by hand.
We can also use our Acrylic sealer in spray form, which will simplify the sealing process, and make applying multiple layers a breeze!
Whichever one you choose, make sure the finished surface is as smooth as possible as this is where the new metal surface will form later in the process.
Be sure to work in a well-ventilated environment, clear of dust, to prevent contaminating the sealant.
Electroforming a praying mantis tips and tricks
This is a “how to” guide for electroforming a praying mantis. These were real praying mantises that were lovingly raised and had a long life. They died of old age, and were donated to me to memorialize. Before I started shooting this video, I had pinned and dried them. (There are searchable videos on how to do this). The above procedure would be how I would approach electroforming any bug. Hope it helps, and please like and subscribe if you like my videos. You can also find me on Instagram and Etsy @rareearthdesigns
Attach The Bail, Or Any Decoration Elements Such As Gemstones, Crystals
Our specimens are now almost ready to enter the electroforming process, we just need to do a few more things as preparation!
First, we’ll need to attach a bail or jump ring to our piece to create an anchor point to hold our specimens firmly in the electroforming bath.
After that, we can choose to add decorative elements such as gemstones or crystals to spice up the look of our piece and add another layer of beauty to our final result!
Bail rings come in many different sizes, just keep in mind that during the electroforming process the diameter of your bail ring will shrink due to metal buildup inside the ring!
Once you find the correct bail ring for our project, we’ll need to attach it.
For this, we use simple super glue.
Attach the bail ring and any decorative elements like gemstones using super glue and let it dry out.
This drying process can be sped up drastically by applying a little baking soda to the glue!
You can also use commercial super glue accelerator, which is available here: https://www.amazon.com/BobSmithIndustries-BSI-151HAccelerator/dp/B0166FFCCS/ref=sr_1_3?dchild=1&keywords=Accelerator+Insta-Set&qid=1616596717&sr=8-3
Add Any Decoration Elements Such As Gemstones, Crystals, Etc. To Take Your Design To The Next Level!
Adding decorative elements to our design is a great way to spice up the final result!
There are many different types of decoration you can add to your piece, like gemstones or crystals, choose some that are to your liking and apply them to your piece!
When electroforming bees, you can choose to add the interior of a real beehive, for really interesting results!
Beehive interiors can be found online, and results can look like this amazing piece: https://www.picuki.com/media/1939783292094066576
Before we apply any decorative elements, we’ll need to do something known as protecting the gemstones!
We must protect our decorative elements in a similar way to our specimens, first, apply a layer of nail polish, on the surfaces that will be electroformed.
After that, cover the decorative elements with a layer of ModPodge, or Liquid Latex.
Coat Piece With Copper Conductive Paint
The final step we’ll need to take before electroforming our insects is coating our specimens with copper conductive paint.
The new copper layer will form on conductive surfaces; therefore, we use copper conductive paint to make the surface of our pieces conductive!
There are many types of conductive paints, be sure to choose the one appropriate for the metal you’re working with, in our case, copper!
Copper conductive paint is applied in a similar way to the sealant mentioned earlier, use a paintbrush, and coat your organic pieces, like leaves or flowers, with several layers of paint, when working with insects it’s better to dip them in the conductive paint, as it better covers the complete surface of the insect.
Be sure to work in a well-ventilated environment, as contaminating the paint can have consequences for its conductivity and thus its functionality!
Electroforming Process
We’re now finally done with all preparations, and we’re ready to start the electroforming process!
Before we can start, we’ll need to set up our electroforming setup!
In a nutshell, fill your bath with the appropriate amount of electroforming solution, place the specimens firmly in the bath and attach them to the bail ring.
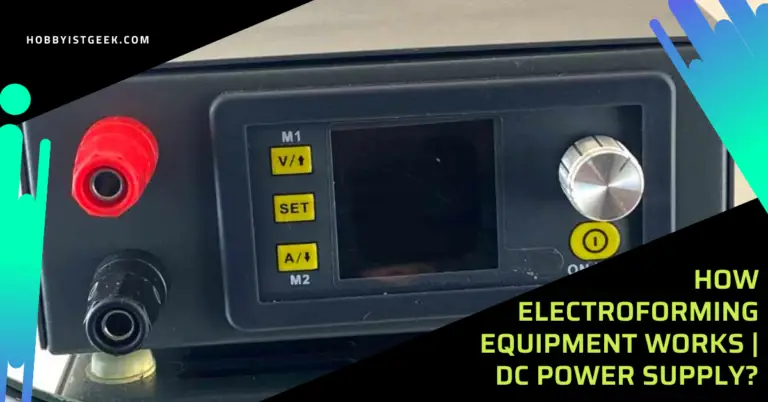
Then connect the rectifier wires to the appropriate spots, the red positive wire should be attached to the copper wire, the black negative wire, also known as the bus bar, should be attached to our specimen itself!
Be sure to add attach a part to your piece to prevent it from floating in the bath, for this you can use something known as a glass anchor, which is a piece of glass on a nylon string, but you can use any weight, as long as it’s non-conductive!
Set the appropriate rectifier settings, and let the electroforming setup do its magic!
Check and supervise the process occasionally!
Take The Insect Out Of The Bath And Neutralize It With Water And Baking Soda
After the electroforming process, you’ll be left with a piece of beauty!
We’re not quite finished yet though!
There are a few more things we’ll need to do, such as neutralizing our piece with baking soda and water and possibly remove the sealant.
Placing our finished pieces in warm water with baking soda will allow the piece to neutralize.
Doing this also allows us to take off the layer of sealant if we want.
It’s always good practice to do this after electroforming!
Polishing, Patinas & Finishes
Now that we have our beautiful finished pieces ready, we’ll need to take the final finishing steps to professionally our electroforming project!
These final steps consist of polishing up the piece, and, if wanted, add a fancy patina finish to our piece!
Polishing our piece will add an irresistible shine to it, we can do this using a small tool like a Dremel or a small polishing tool, or we can do it manually using something like steel wool.
Whichever method you choose be sure to wear a mask and polish until it shines brighter than the sun! If you want to add a fancy finish to your piece, we can add a patina finish, using liver of sulfur and warm water, many different finishing effects can be achieved.
Aguide on finishing effects can be found in the 6th section of this article: https://enchantedleaves.com/pages/electroforming-tutorial-free-step-by-step-guide-to-making-copper-electroformed-jewelry-learn-how-to-electroform#Step6
Coat Insect/Organics To Prevent Oxidation
The final step in our finishing process is coating our finished insect to prevent oxidation.
Oxidation occurs when a metal piece is exposed to moisture and the elements.
To prevent this we apply a sealant to waterproof the metal and protect it from the elements.
For this we use a substance known as Protectaclear, Protectaclear is available as a spray or as a liquid, and there are different finishing types available.
Choose the one to your liking and apply several layers of the substance, let it dry out, and voila! You’re done!
Final Thoughts For How To Electroform Insects? | Step By Step
After following along with this article you’ll have immortalized a beautiful piece of nature through the gorgeous art of electroforming!
Congratulations! Insects and organic elements are some of the hardest electroforming projects you can find, so if it didn’t work out the first time there’s no shame in that!
Keep your head up and try again! Thank you for reading and good luck on your journey to become an electroforming artist!
If you’re interested in electroforming, you must check out “Electroforming: The Ultimate Guide” on our blog. This comprehensive guide covers everything you need to know about the electroforming process, from the basics to more advanced techniques. It’s the perfect resource for anyone looking to learn more about the electroforming process. So, what are you waiting for? Click on the link and start reading “Electroforming: The Ultimate Guide” now!
Sources In MLA Format:
Ashleyjlong, and Instructables. “Preparing and Gilding a Real Insect.” Instructables, Instructables, 1 Oct. 2017, www.instructables.com/Preparing-and-Gilding-a-Real-Insect/.
“Chemicals For Insects.” Extreme, extreme-macro.co.uk/chemicals-for-insects/.
“Electroforming Tutorial – Free Step by Step Guide to Making Copper Ele.” Enchanted Leaves, enchantedleaves.com/pages/electroforming-tutorial-free-step-by-step-guide-to-making-copper-electroformed-jewelry-learn-how-to-electroform#Step3.
“How to Pin and Spread Butterflies and Other Insects for Display.” Home Training Tools Ltd., Home Training Tools Ltd., 2007, www.homesciencetools.com/content/reference/IN-INSEPIN.pdf.
Insect4Sale.Com – School Insect Collectios, www.insects4sale.com/.
jasonwelshedu. “Protecting Stones When Electroforming.” YouTube, YouTube, 24 Mar. 2018, www.youtube.com/watch?v=67VBQKkFNss.
“Relaxing Insects.” Extreme, extreme-macro.co.uk/relaxing-insects/.
Where to Find Insects, www.bugcollectors.com/where-to-find-insects.
Www.thebutterflycompany.com, Tbc -. “Re-Hydrating Process.” The Butterfly Company, www.thebutterflycompany.com/article/re-hydrating-process.
Michael
ELECTROFORMING | FUSED GLASS | METAL ARTIST
I’m documenting my electroforming journey step by step. I wish I had this information when I started my electroforming journey.
Pinterest
Facebook
Let Us Know What You Think
Electroforming: The Ultimate Guide Check It Out!
- Electroforming Conductive Paint, Where To Buy It, And How To Make It – The Ultimate Guide - April 24, 2021
- Copper Electroforming Solution Recipe - April 20, 2021
- Can You Electroform Polymer Clay? - April 13, 2021

